


The issue of replacement iPhone batteries has grown significantly over the past two years, for obvious reasons. Plus, not everyone wants to go to the store for an iPhone 15 Pro Max when the old one suits everything.
A new “battery” will first restore battery life and often even increase the performance of the iPhone for relatively less money than buying a new one. One problem: it needs to be installed somehow.
In this article we will look at how to replace the battery on current iPhones. We provide instructions, tools and some warnings so that you understand what is happening.
Important information about replacing the battery on an iPhone in Russia

You can check your iPhone battery status here: Settings → Battery → Battery status. If it is time to replace it, a corresponding recommendation will be displayed here. But this process became more difficult just a couple of months ago.
Not only are all ASCs de facto limited to almost any official service for Apple gadgets in Russia, but the company itself is not asleep.
For example, it will be possible to replace a battery in Russia at any third-party service center (and ASC!) only two ways:
❗️ or with saving the battery state in the settings (interest in the institution). Maximum capacity)
❗️or without it, but with the error of unoriginality of the installed battery.
Why did this happen? Let’s look at the facts.
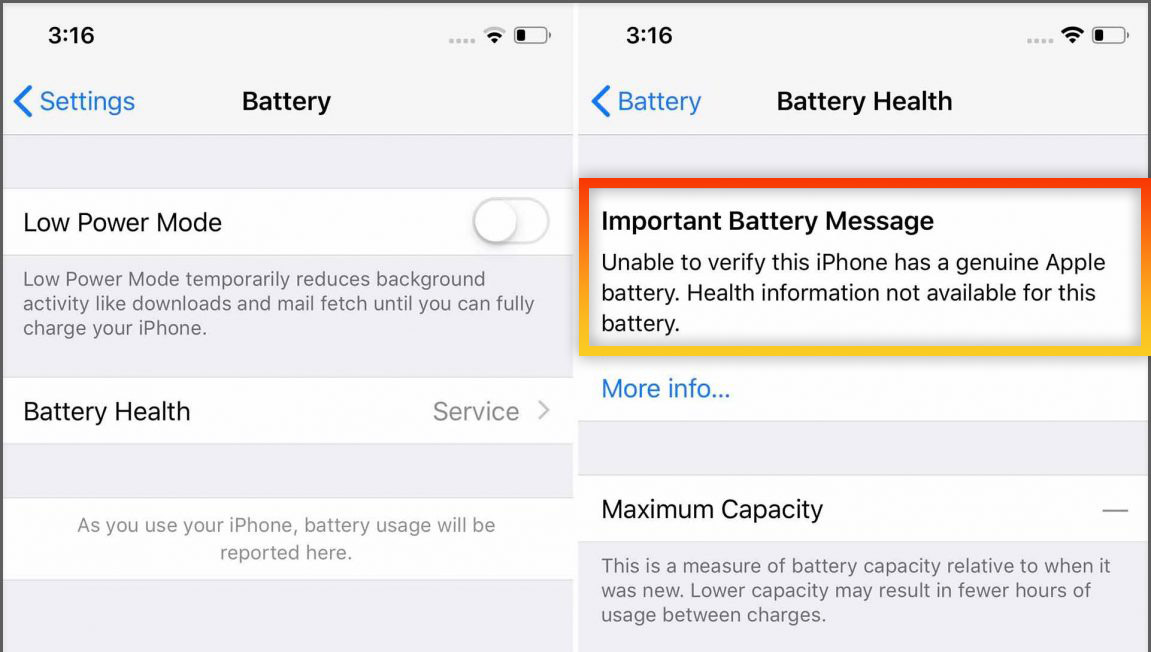
An example of an error displayed after replacing the battery in the CC door.
After replacing the battery using unofficial methods, even a 100% original iPhone spare part will display an error in the menu. Settings → Battery. This does not affect the performance of the device, but reduces its attractiveness on the secondary market.
Previously, this problem was solved by switching the controller from the old battery to a new one. Then it was reflashed so that it again displayed 100% maximum capacity in settings. Then there will be no errors in the menu.
But starting from iOS 17.4, the ability to flash the controller has stopped working. The Chinese will eventually get around this problem. But until this happens, iPhone owners have to choose from two non-ideal options when repairing it in a service center: either an error or the old “percentages” in the menu.
For those who replace the battery at home, they choose and do not worry at all – in settings there will be the same mistake in English. Please read this warning.
What you need to replace the battery on your iPhone

▪ battery. Look in marketplaces for models with good reviews and pre-installed adhesive tape. For example, this one is suitable for iPhone XS.
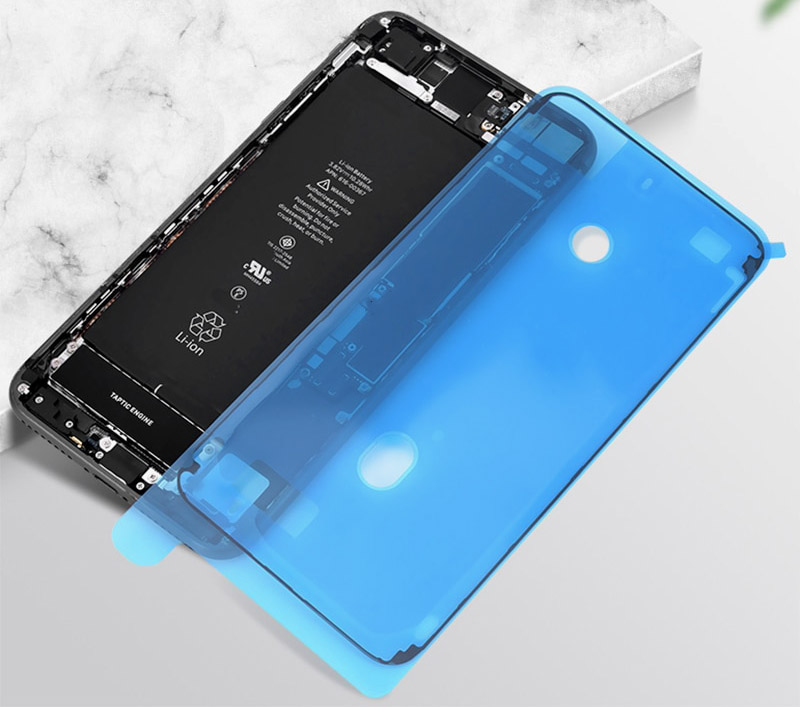
▪ new adhesive for monitors. Several pieces are sold on marketplaces.
battery adhesive. Typically available in quantities of 10 or 100.
▪ set of tools for disassembling smartphones. These are sold on marketplaces, anyone should take them – for example, this one. They should have a suction cup, several mediators, tweezers and various screwdrivers.
▪ hair dryer. Household ones are quite suitable, but with construction ones it will be faster.
▪ order on the table. Create an area where you carefully place the screws. During the repair process, write down where each one is removed from and where you put it so you don’t get confused later.
Important. Do not replace it yourself if:
● front glass cracked
● the body is curved
● there are deep dents on the frame.
● was already planning to repair the deviceIn this case, in the absence of experience, the risk of completely “killing” the device is too high.
Instructions. How to replace iPhone XS battery
In this case, let’s look at disassembling the iPhone XS. At its core, the process is similar to the modern iPhone, the difference is only in a few small details.
Before starting the procedure, turn off your iPhone.
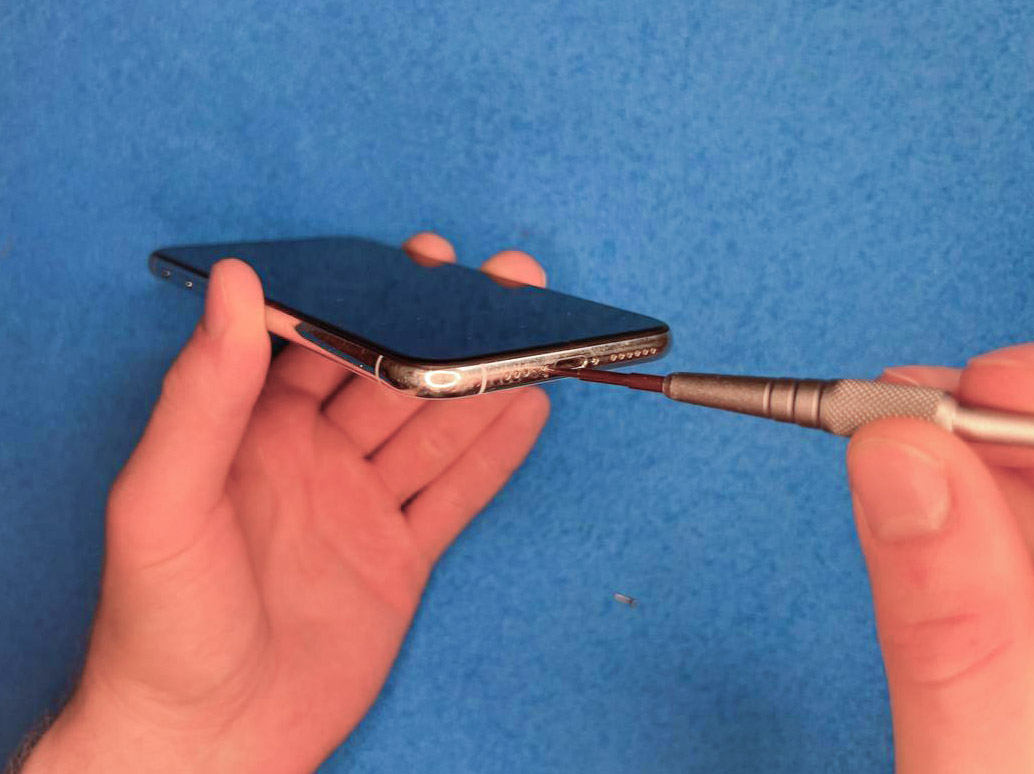
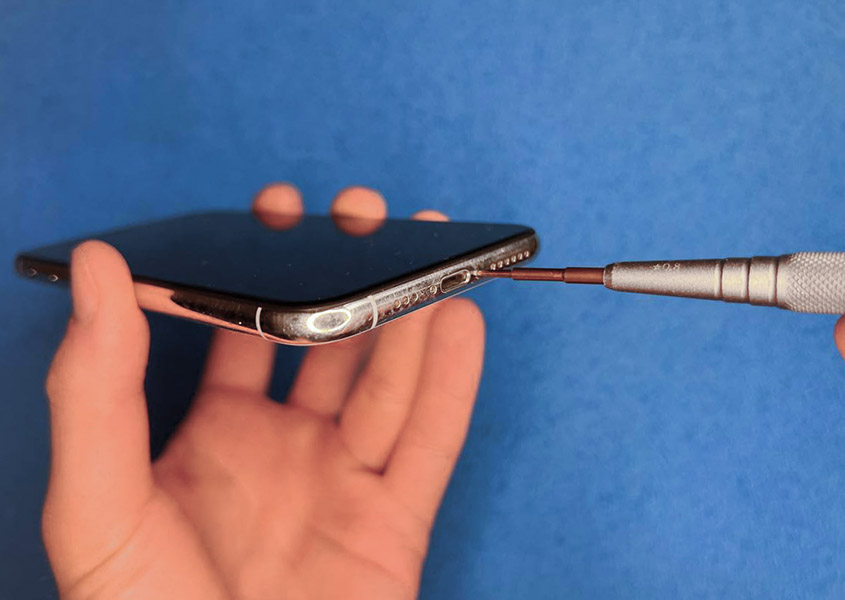
1. Unscrew the two screws on the bottom edge of the iPhone. You need a P2 Pentalobe screwdriver.
2. We heat the indicator to loosen the sizing. You probably don’t have the equipment for this, so you’ll have to use a hair dryer.
During the screen removal process, you will need to warm up the screen if it gets cold. Without successful heating from connecting the screen it will not work.
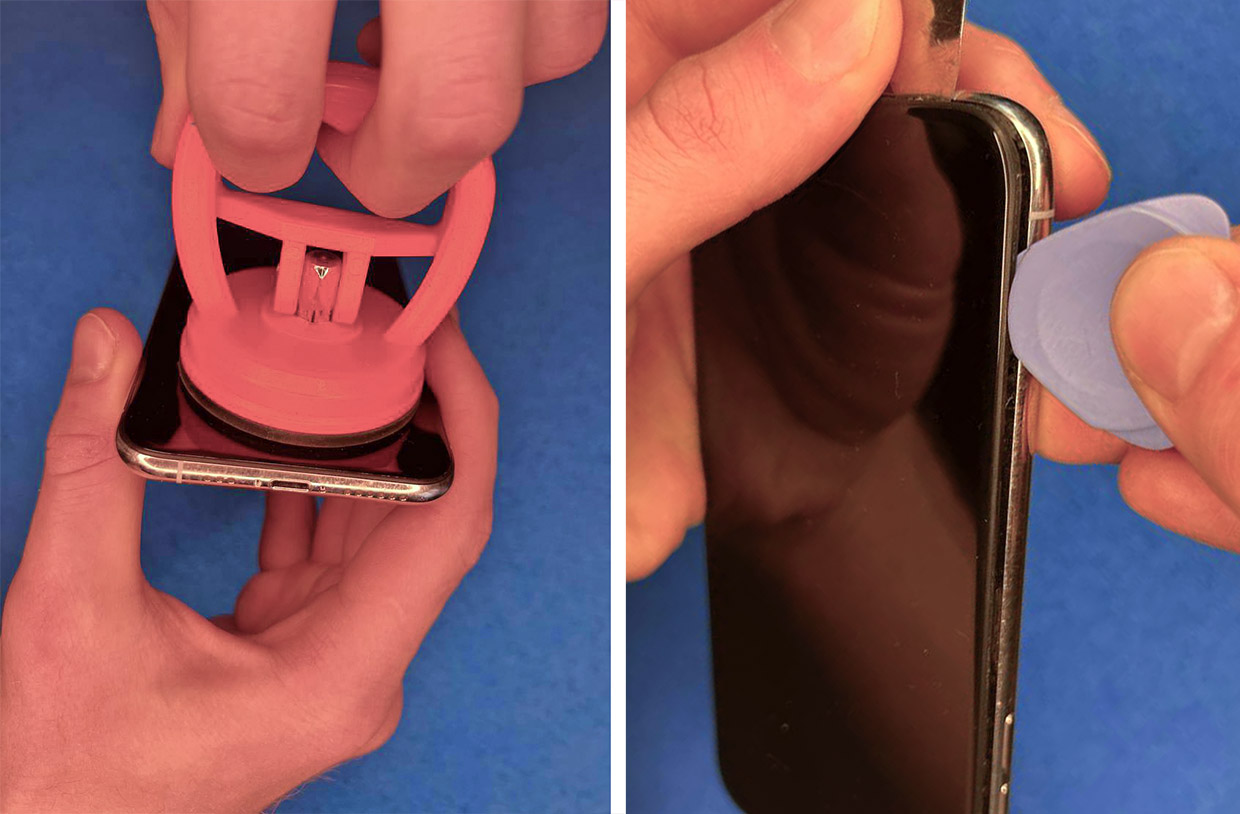
3. Attach the suction cup to the bottom of the screen. Pull it up, thereby slightly lifting the display module. As soon as it rises, at least by a few millimeters, insert a pick or (any similar tool) between them.
Do not pull too hard as this may damage the screen. Its task is simply to create a strip between the earphone and the body. Leave the pick or similar tool on the bottom of the cavity for now so that the display closes.
4. From the cavity you are sliding out, slowly and shallowly slide the second pick all the way down the left edge of the display. Provide it shallow, maximum 2 millimeters.
Then repeat the same on the right edge. And finally, from above, where he was given the maximum shallow depth, literally a millimeter.
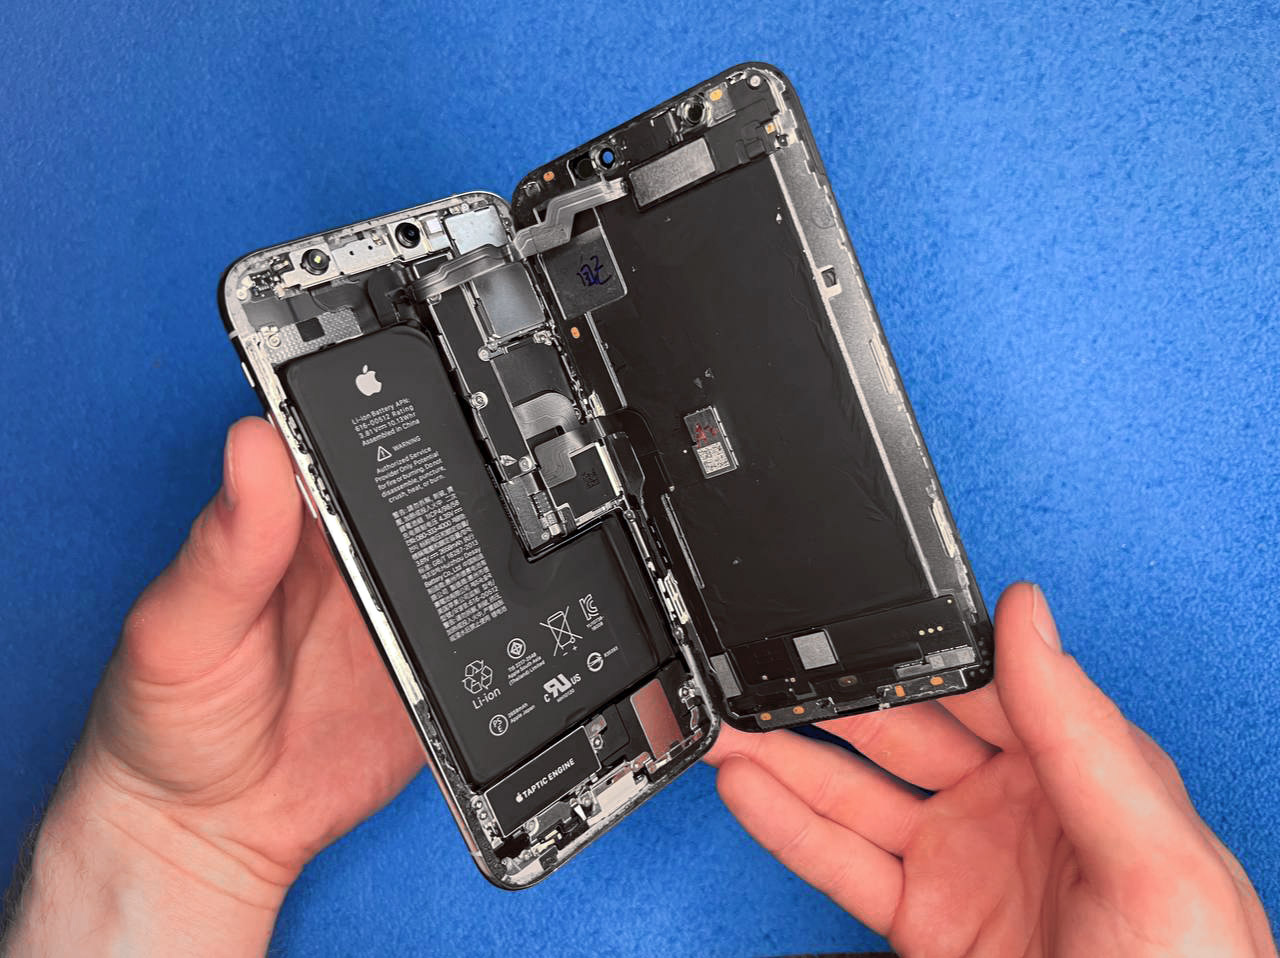
5. After this, the display must be disconnected from the case and frame. Don’t rush to lift it up or even tear it off.
6. Place a rectangular object on the right side of the iPhone – for example, a book. Gently lift the indicator from left to right as a book opens. Let the lamp rest on the object at an angle.
Important: The iPhone display opens differently depending on the model. On older models it can open up, but on the iPhone 13 it can open to the right. Be sure to check this point on YouTube guides before removing the module. The cables are fragile and can be easily damaged.
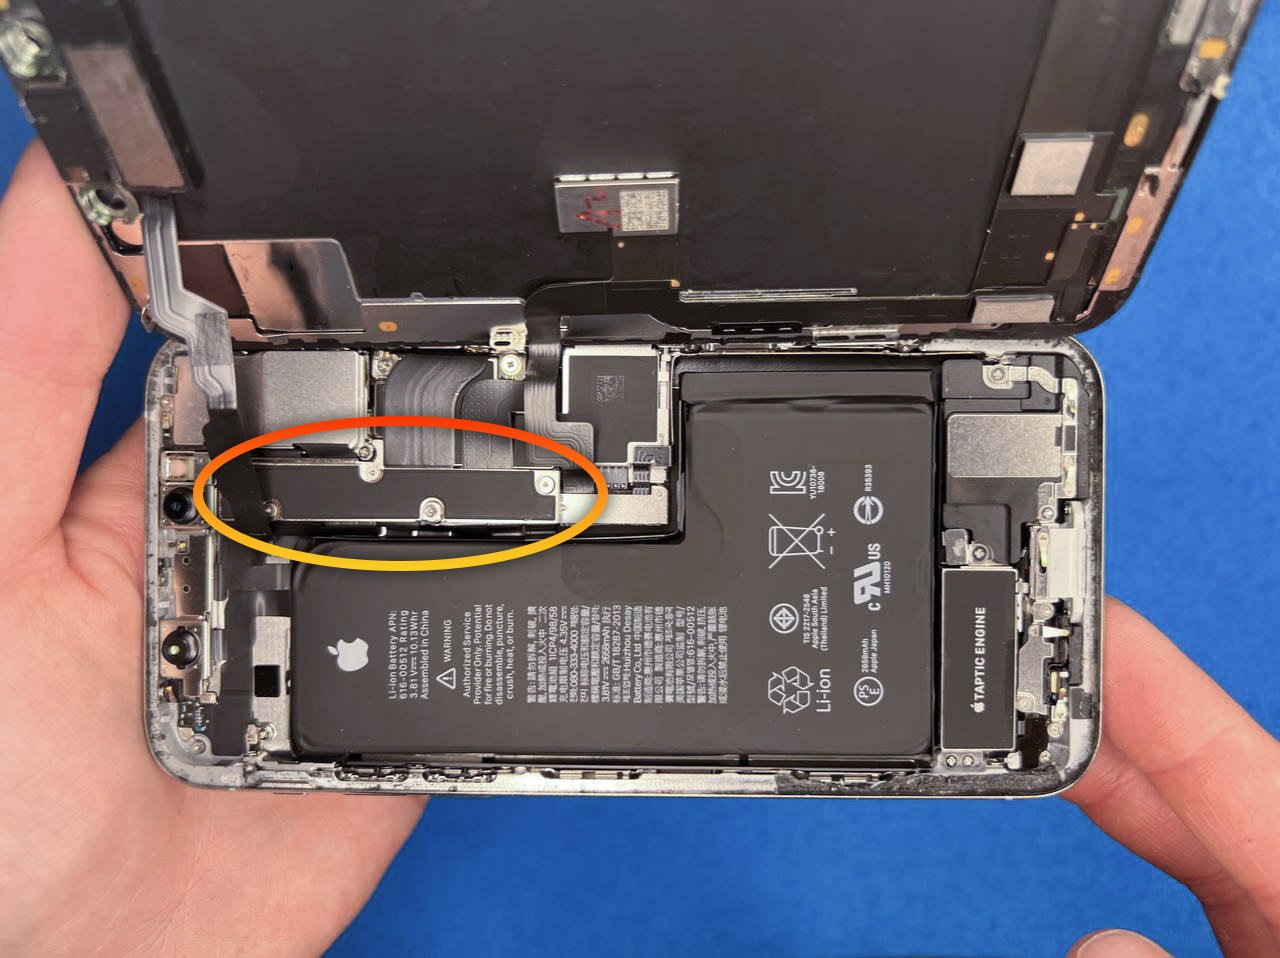
7. Remove the three screws from the display cable shield.
First, pick up the connector of the battery cable and bend it slightly to the side so that it does not accidentally touch the board.
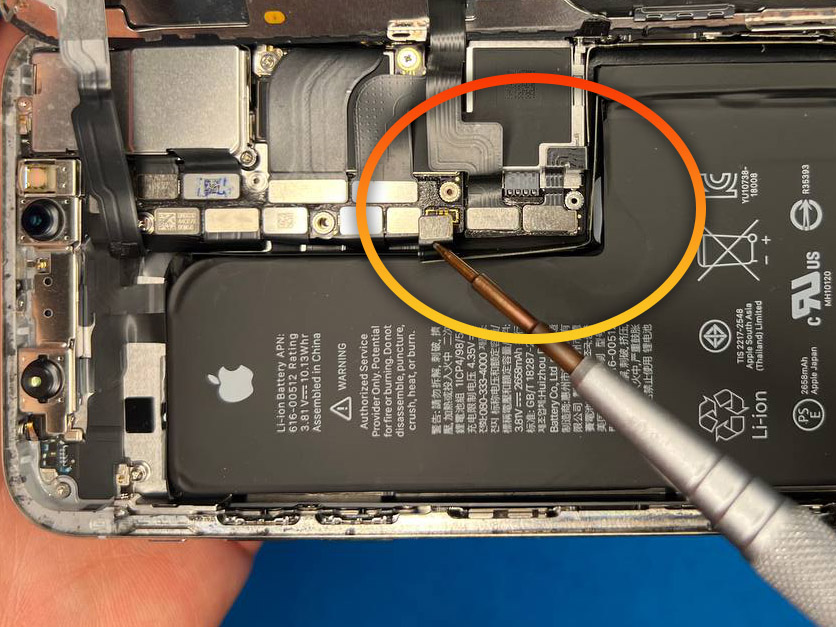
Then pick up and disconnect first the second, dual connector of the display cable. Finally, disconnect the topmost touchscreen connector.
Important: Different iPhone models have completely different connectors and cables. For example, the iPhone has 13 cables, one less, and more shields. If you have figured out how to disassemble one iPhone model, this does not mean that you automatically know how to choose another. Check the guides for your specific iPhone model and version.
8. After this, the display should be freely detached from the case. You can remove it and put it away so it doesn’t interfere.
9. Remove the old display adhesive.
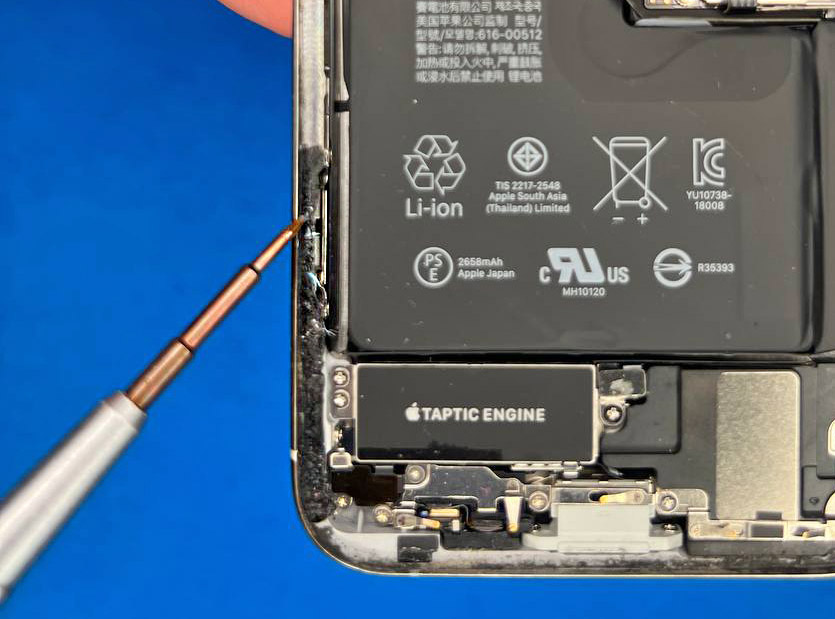
10. Now comes the most dangerous procedure. You need to carefully remove the double-sided tape that secures the battery to the case. This particular iPhone model has three of them: two at the bottom and one at the top. There are also four – for example, on the iPhone 13.
To begin, pick up the edges of the tape from the battery using tweezers and peel them away from the battery a little so that you can later grab them with your fingers.
If you damage the double-sided tape, you will have to heat and pick out the battery, and this entails a risk of fire and a lot of complications. This case, although it is a special case, we will not consider here.
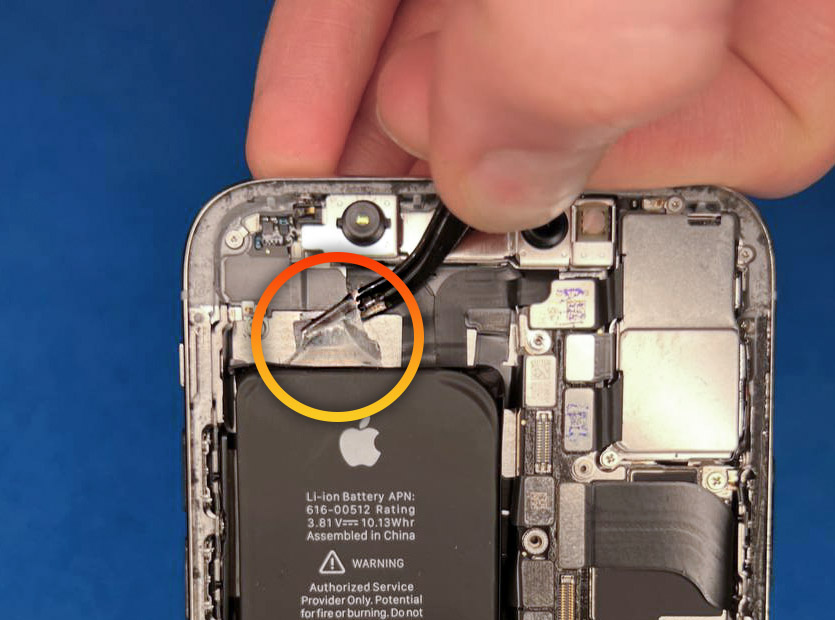
eleven. Take the edge of the iPhone with the fingers of one hand and rest the pointer on the battery. Then carefully, slowly and without haste, pull the tape away from the battery – not up or to the side.
Pull each strip of tape until it shoots out from under the battery.
If it suddenly breaks, which often happens on smartphones after several years of use, then it is better not to continue the procedure yourself and contact a service center.
And if you think that the tape is starting to tighten too much, then it’s better to let it go. Using a needle, apply a small amount of isopropyl alcohol under the battery and wait a few minutes. Then the remaining tape fell out.
12. If everything worked out, congratulations. Now you can carefully pry up the battery and remove the case.
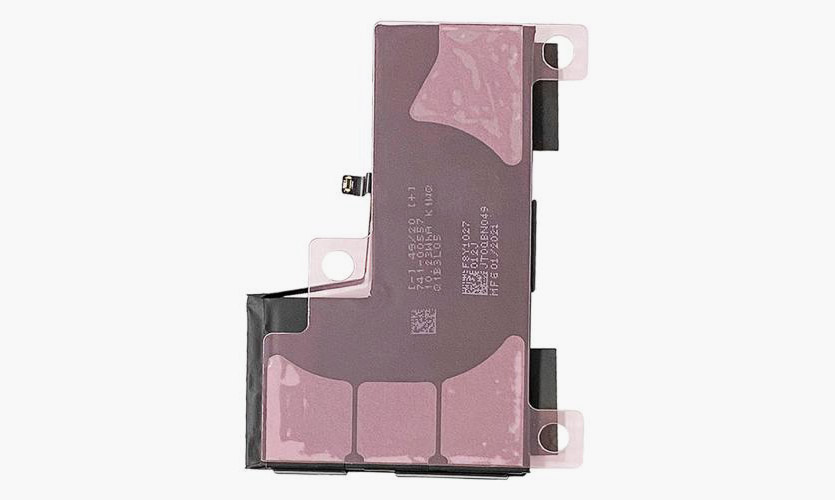
An example of an iPhone Xs battery with pre-installed tape.
13. We take a new battery. He may already have new tape applied. If not, then stick it on, following the stencil.
Check that the tongues that were previously used to pull the previous battery are bent to the outside.
14. Install the battery in the same position as previously installed. Make sure that the battery cable is not pinched and does not reach the connector on the board, but do not connect it yet.
15. Press the finger on the top of the battery so that the tape is tied to the case.
Example of sizing for video cards. It always comes with a stencil, so the installation process is simple.
16. Install tape around the new monitor. To do this, align it with the frame of the case, detach the film from the central part and for now leave the one that remains on the edges.
17. In order not to disassemble the iPhone at all after assembly, connect both display cables, the battery cable and configure the iPhone. If it turns on, then you did everything right. You can turn it off and start assembling.
18. Screw all the removed panels back, and then remove the film on the sizing with the frame.
19. Carefully return the display to its place, making sure that the rifle hits the right place. Snap it into the body, into the recesses along the edges.
20. Look at the iPhone. Does the display light up evenly, does nothing stick out? Then that’s it, you replaced the battery yourself, congratulations!
Screw the two screws onto the bottom edge and enjoy your health.
Why replacing the battery yourself is unsafe and not very profitable
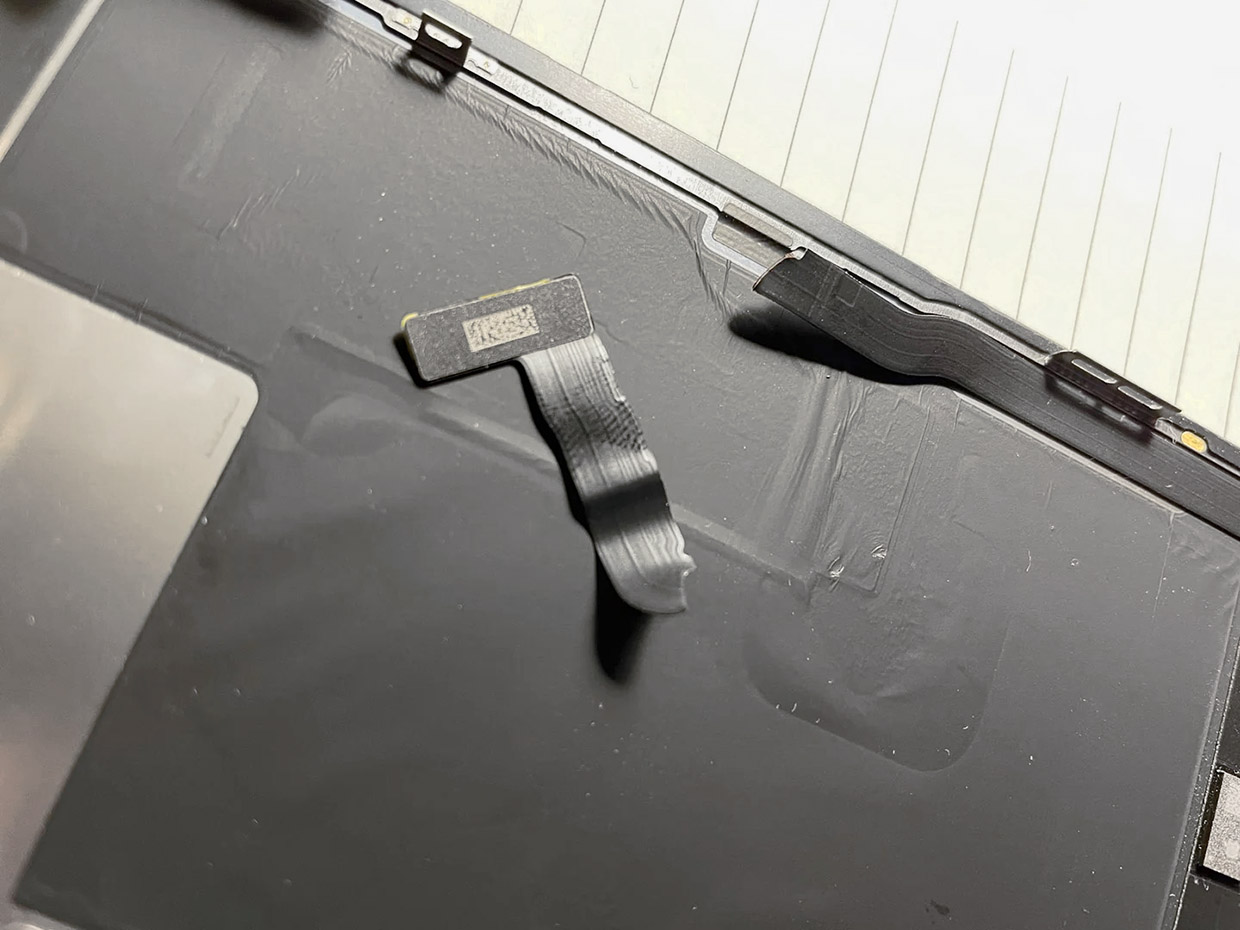
A broken display cable is a very expensive mistake on modern iPhones.
Each stage of disassembling and assembling an iPhone is associated with risks to its performance. By performing this process yourself and without much experience in smartphone repair, you take full responsibility.
Any damaged cable and connector led to a serious increase in the cost of the process. They will need to be purchased in addition, often along with the modules themselves to which they are attached. Some breakdowns, for example, in the upper zone with Face ID, can require deep repairs that are impossible to carry out at home.
In addition, unsuccessful attempts at self-repair increase the cost of the craftsmen’s work – they have to solve not only the main problem, but also the ones you actually created manually.
—
🧑🔧 If you still don’t risk changing the battery yourself, contact the FixSpot.ru service center.
The guys specialize in on-site service, and in case of complex repairs, they will pick up the device and bring it back. Use original class models and give 6 months warranty at all jobs.
Source: Iphones RU
I am a professional journalist and content creator with extensive experience writing for news websites. I currently work as an author at Gadget Onus, where I specialize in covering hot news topics. My written pieces have been published on some of the biggest media outlets around the world, including The Guardian and BBC News.
: Everything we know a week after its release")


