


Microsoft Outlook is one of the most popular email servers in the world. It can be used both to create a personal email account and in the business version, where, among other functions, there is a specific registration.
But what they both have in common is this Possibility to sign sent e-mails. With this, you can create a type of registered trademark that includes contact information, professional information, among other elements. You can also add images or other graphic elements, of course.
And today TecMundo teaches you how to make signatures in Outlook. Check this out!
How to sign in Outlook from PC?
1. Open the Microsoft Outlook application for Windows and Mac or access the official website of the email service via this link;
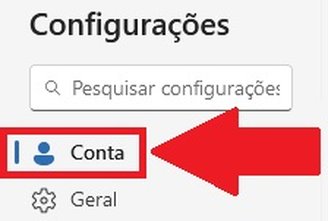
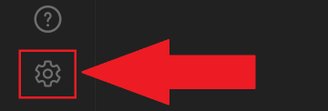
2. Once there, click on Settings, represented by a gear icon at the top of the screen on the right, as shown in the image below;
3. Then click on “Account”;
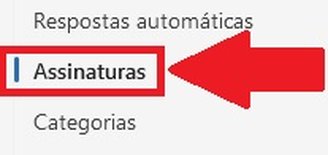
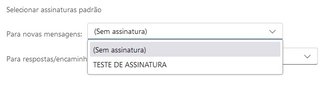
4. Click “Subscriptions” in the window on the right;
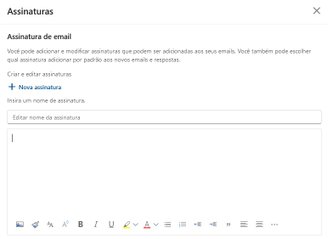
5. Then you can enter the text and personalize it to create your signature. To do this, use Word, Excel, etc. Just use the text field with standard editors of Microsoft applications such as;
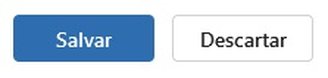
6. After creating your email, click the “Save” button at the bottom of the screen;
7. Now you need to choose whether the signature you created will be used and when it will appear;
8. That’s it, your Outlook signature has been created and you can use it as you wish.
How to sign in Outlook on your mobile phone?
1. Open the Outlook app on your smartphone;
2. When you arrive at the main screen of the application, click on your profile photo on the left, at the top of the screen, as shown in the image below;

3. Then click on the gear icon to open the “Settings” menu;
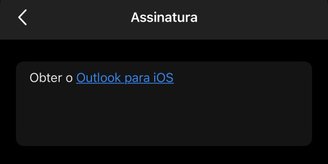
4. On the screen that opens, press the “Subscription” option;

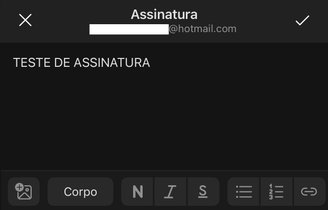
5. Then click on the signature that appears by default to create your own signature;
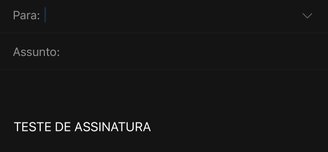
6. Next, create the text you want to put in your signature. When you’re ready, click the “check out” icon to save everything done;
7. That’s it, your signature will now be created in all emails sent.
Did you like the content? Repost on your social networks and tell your followers about this tutorial. Until next time!
Source: Tec Mundo
I am a passionate and hardworking journalist with an eye for detail. I specialize in the field of news reporting, and have been writing for Gadget Onus, a renowned online news site, since 2019. As the author of their Hot News section, I’m proud to be at the forefront of today’s headlines and current affairs.
: Everything we know a week after its release")


