


The need for a stable VPN service is met every day. More and more foreign sites refuse direct connection from the territory of the Russian Federation, some games and services weed out users on request.
If you are tired of constantly sorting through a server with a stable connection speed for free, and before purchasing a paid plan it stops the possibility of blocking the service, it is recommended to set up your own VPN according to our simple and accessible instructions.
A year ago, we already used this path with the saving of time and effort, but in recent months everything has changed a lot. Service developers bring back new features, taking all the routine and configuration on themselves. We just have to choose the necessary parameters and pay for hosting.
To create your own VPN, you have more options to fiddle with the command line, connect to the server via SSH and the appearance of an external client client to add.
How to set up your VPN right from your iPhone
We will need server rental services with the ability to deploy our own VPN on it. You can regulate the services of such providers:
▶ IPhoster – a good selection of foreign servers;
▶ ServerSpace – a large number of cloud services;
▶ VDSsh – a wide range of server configurations;
▶ VDSina – soft tariff for 198 rubles. per month.
I propose a step-by-step implementation at the last stage.
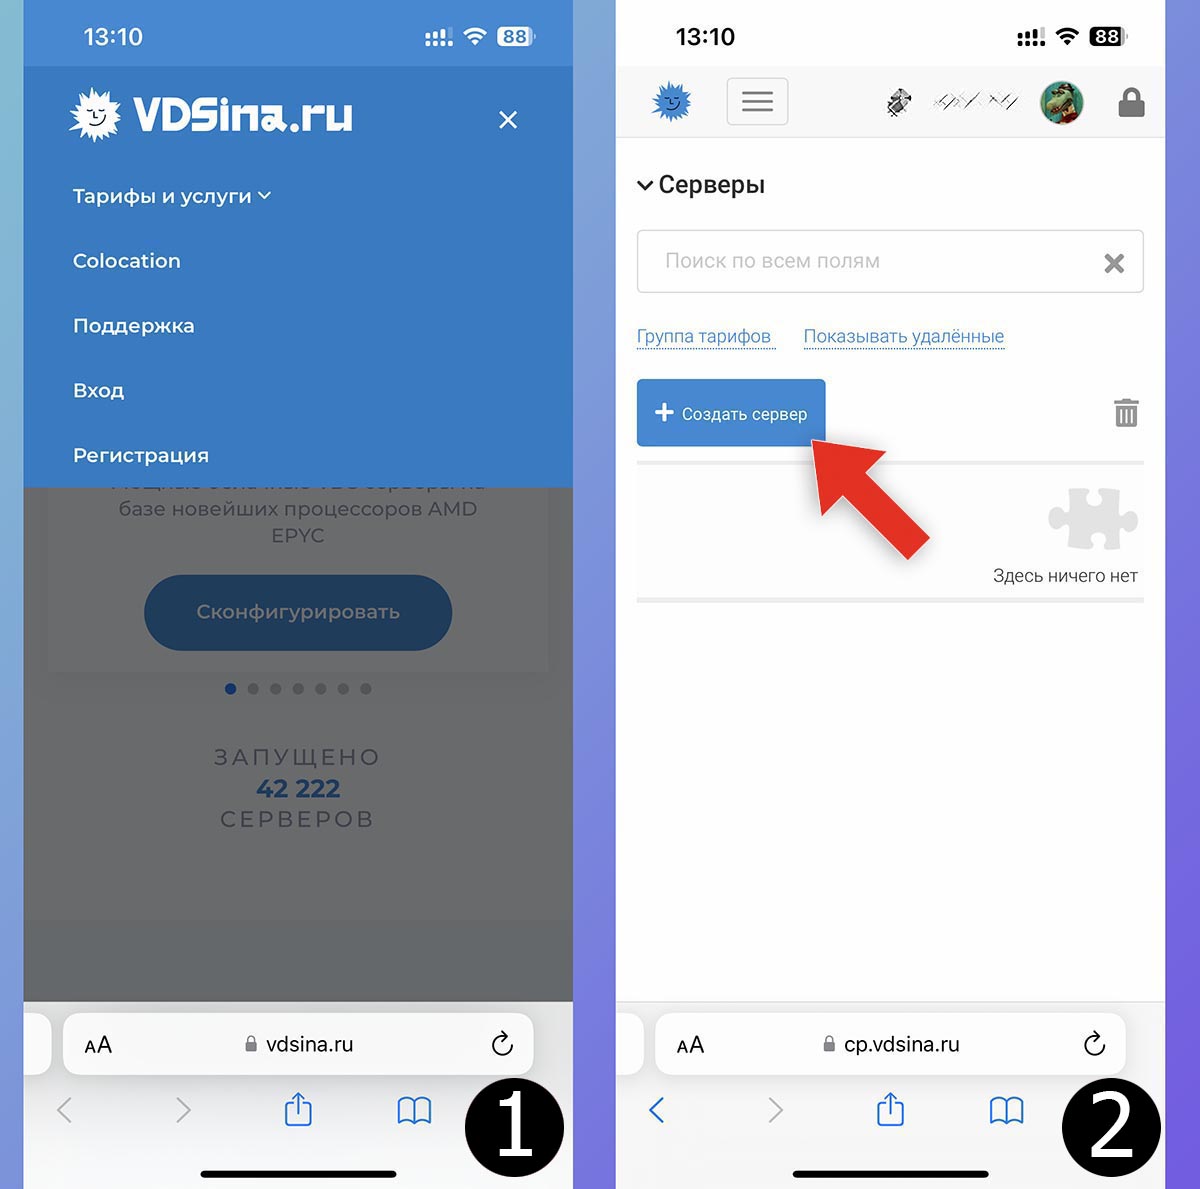
1. Go to the VDSina website and register.
There may be several options for actions on another hosting.
2. Click the button in your account Create a server.
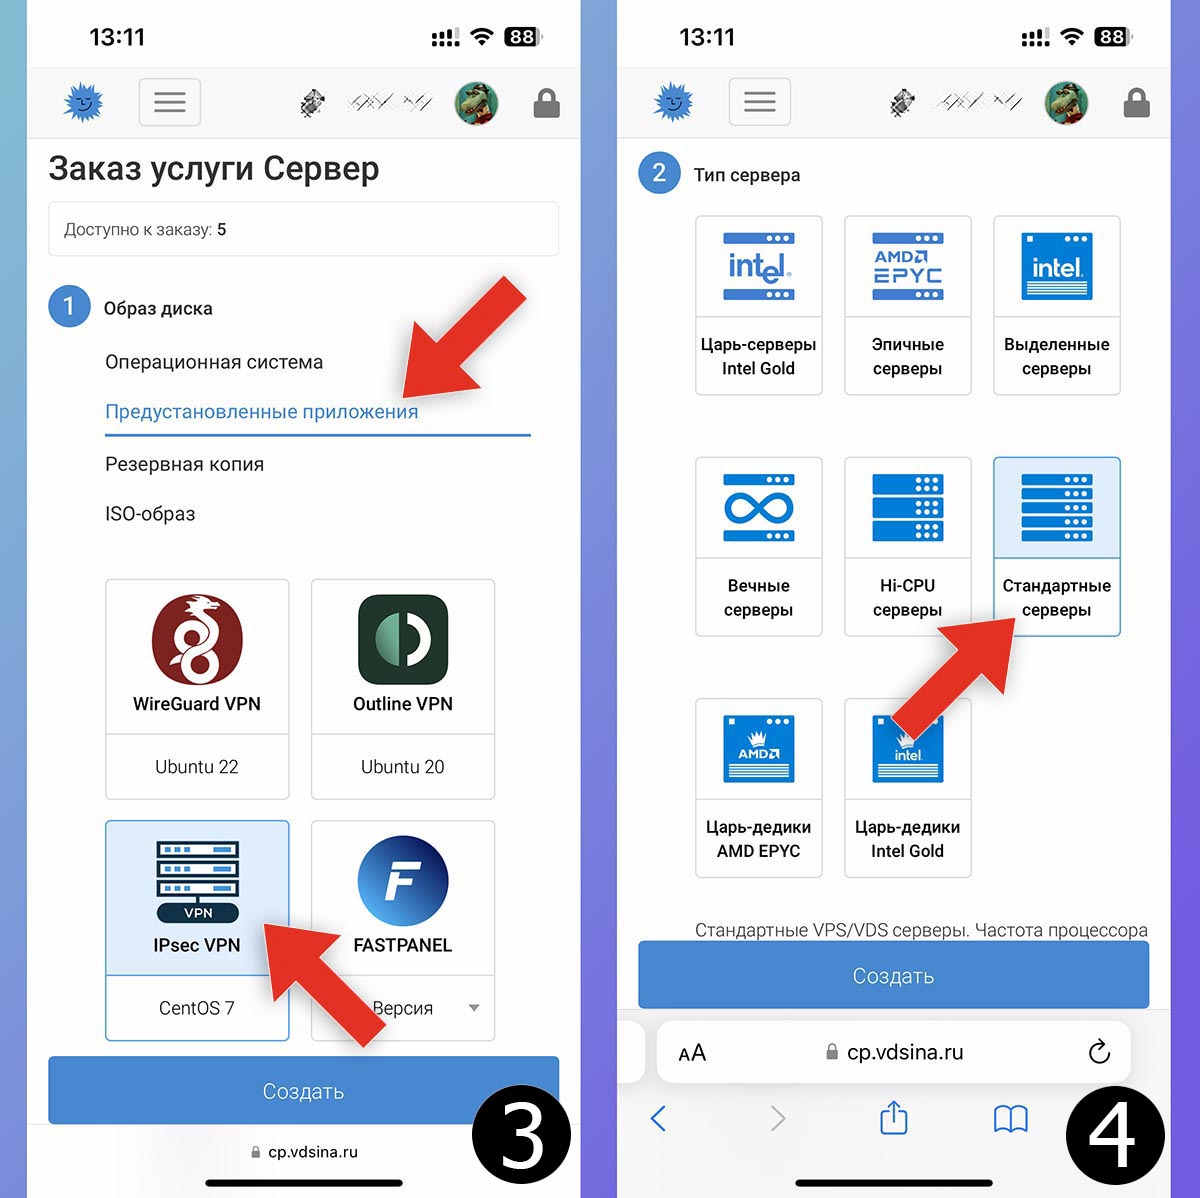
3. When choosing a surveillance system Preinstalled Apps – IPsec VPN.
4. In chapter Server type mark Standard servers.
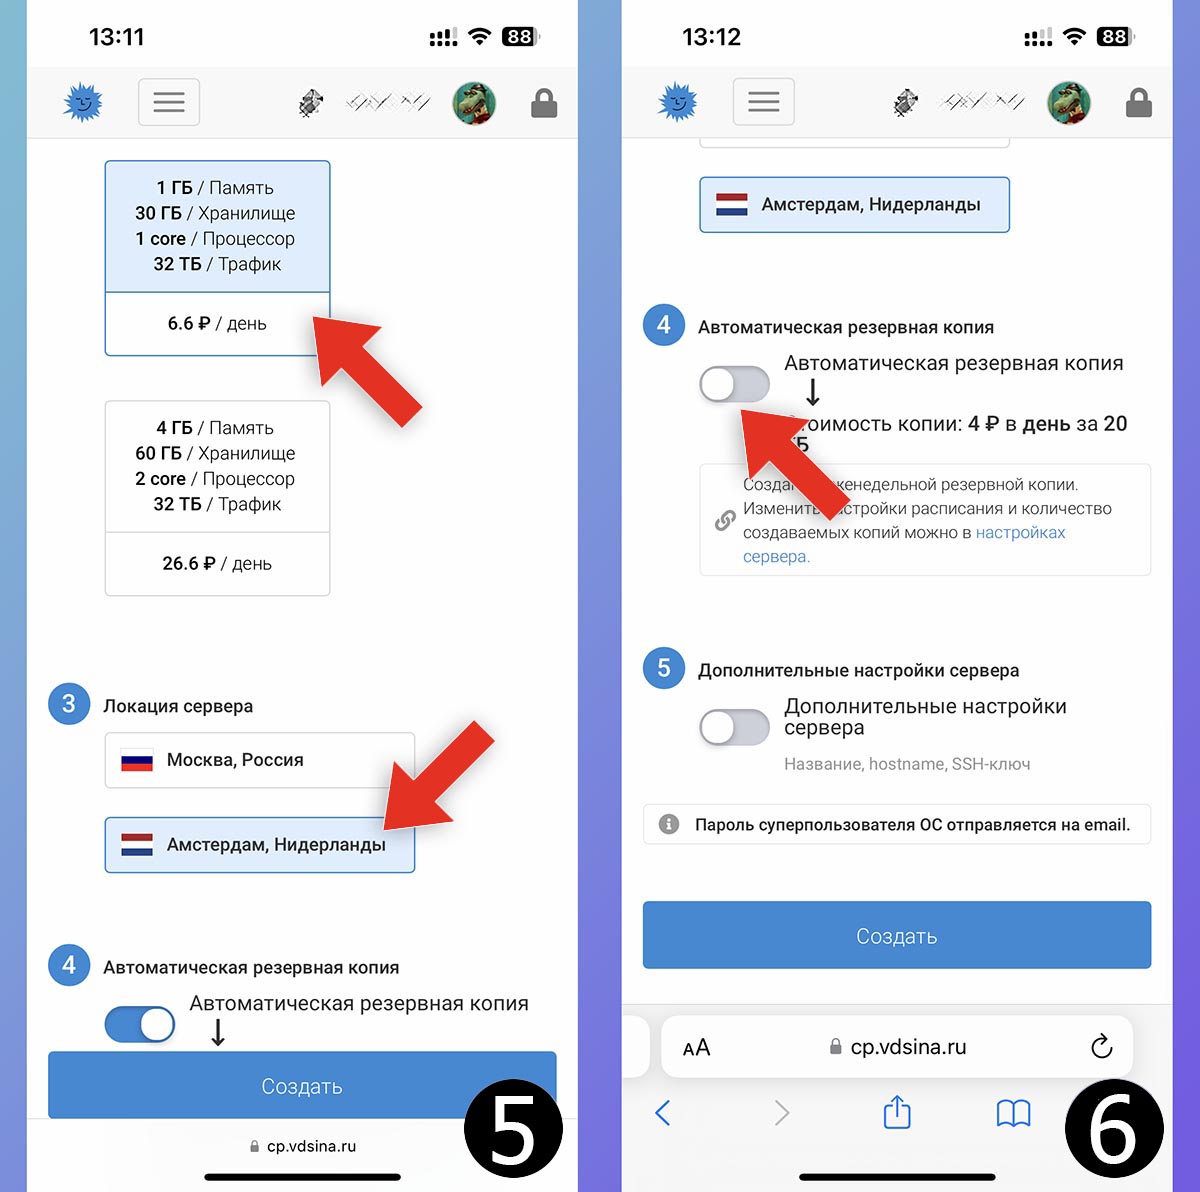
5. Next comes the base height for 6.6 rubles per day and change the server location to Amsterdam.
6. Disable daily backups on the server.
7. Click the button Create.
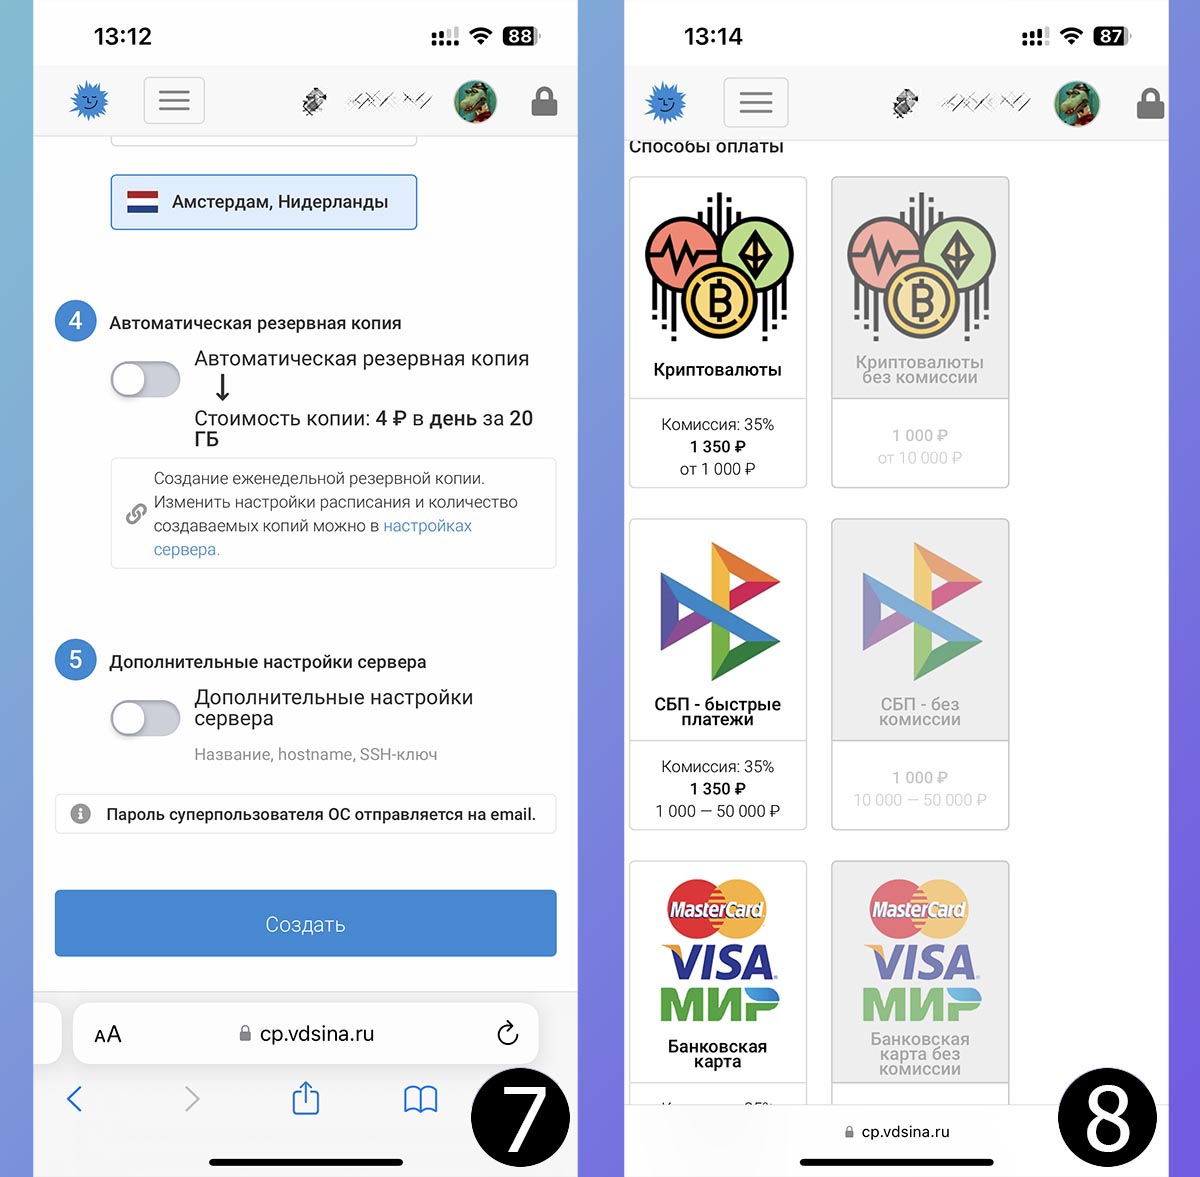
8. Pay for the server in all available ways. There are several options, including cryptocurrency, via SBP, Russian or foreign card.
As a rule, the larger the amount deposited, the lower the commission.
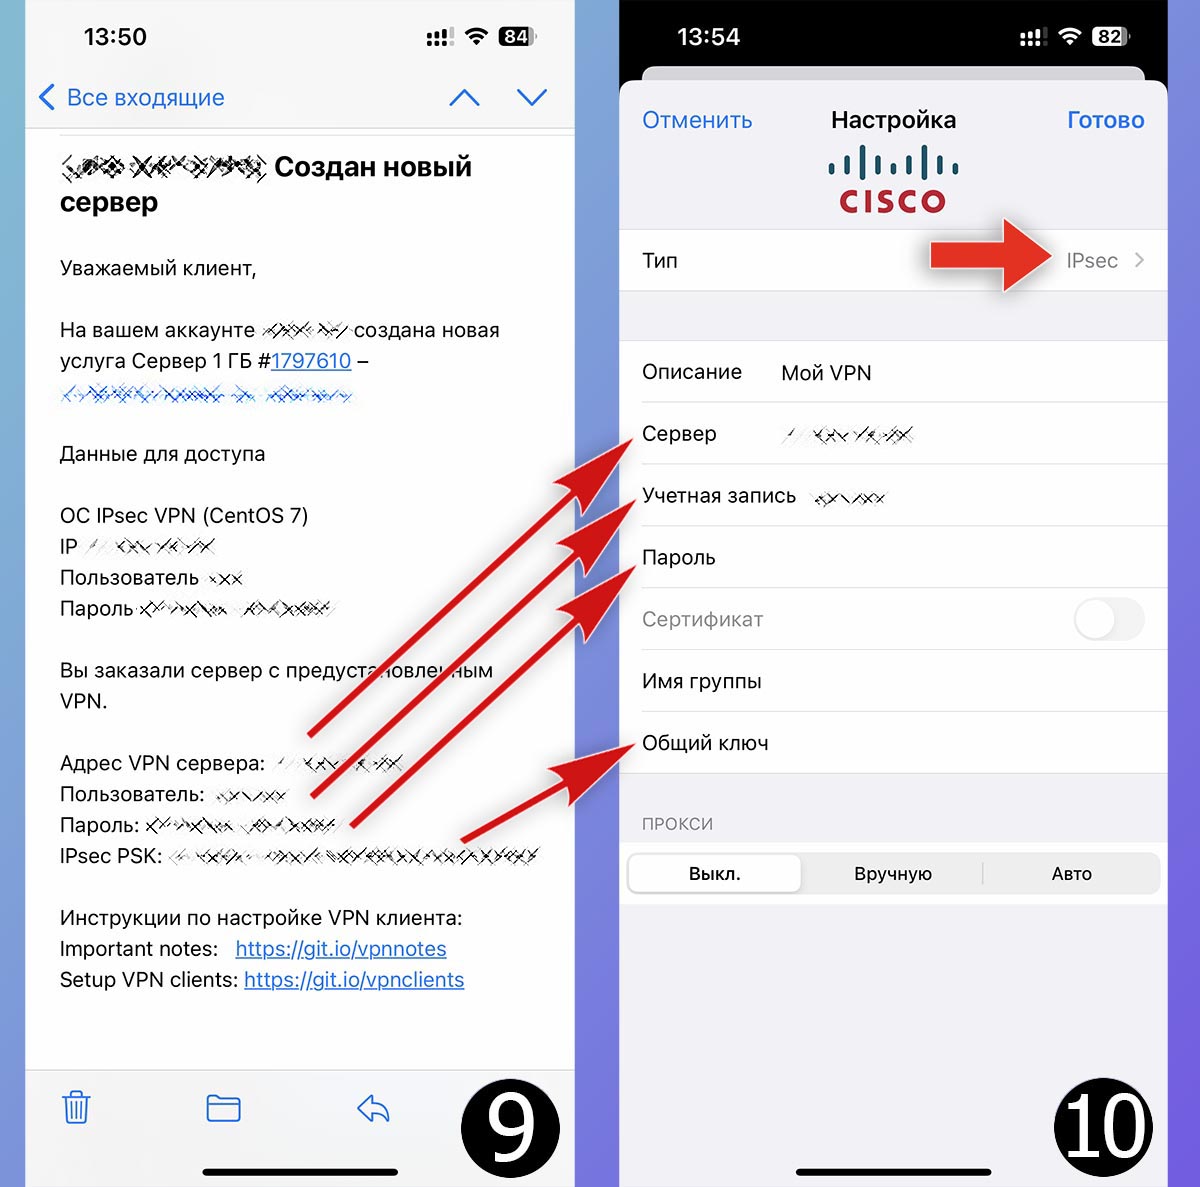
9. Upon completion of the operation, an email will be sent to the mail with the data of the created server and parameters for VPN adventures.
10. Transfer data from email to iPhone settings (Settings – VPN – Add VPN setting). It is not accidental to change the connection type to IPsec.
◈ VPN server address → Server
◈ User → Account
◈ Password → Password
◈ IPsec PSK → Shared Key
Save VPN settings and you can use.
This is how you set up your own VPN in a few minutes, and its settings are transferred to the iPhone. Everything works without the command line, SSH connection and external clients on the smartphone to install the profile.
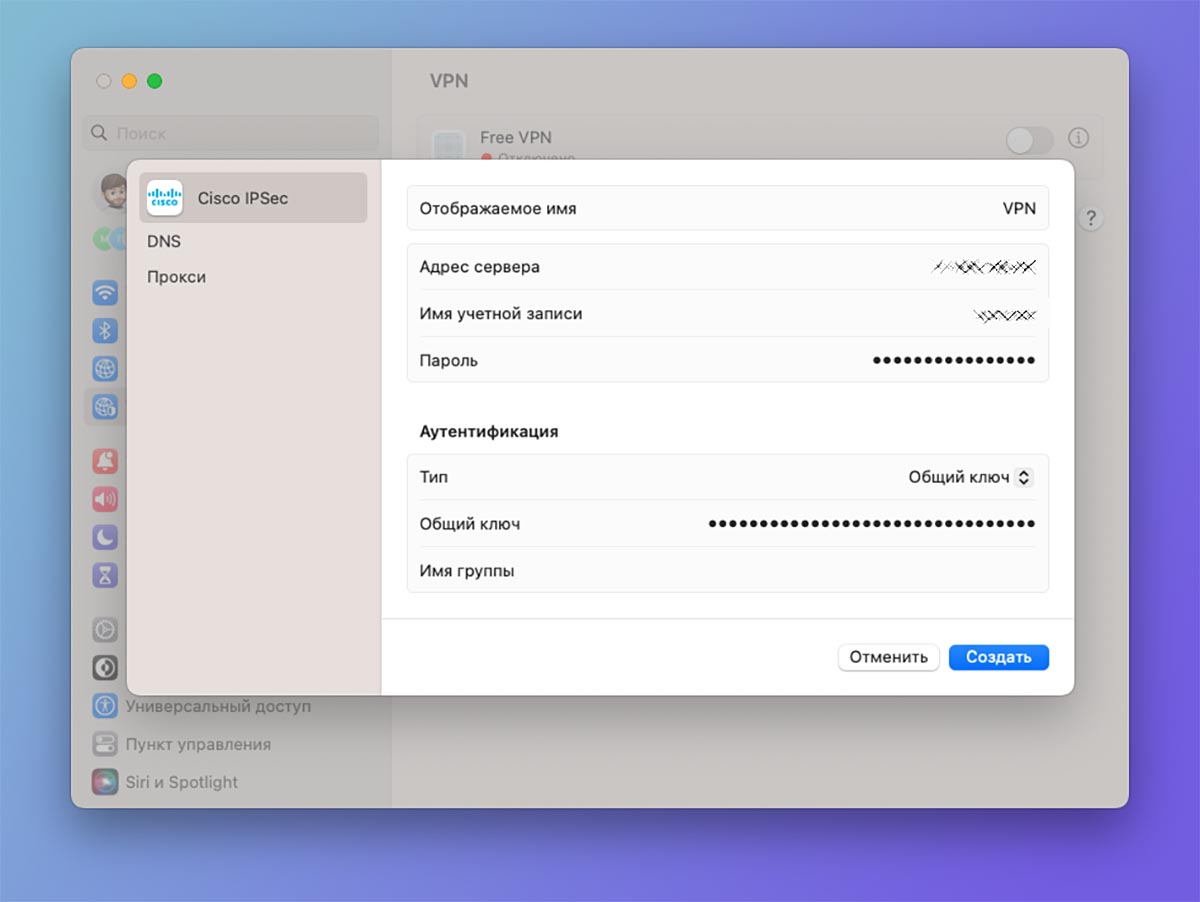
You can add height to your Mac by identifying timing in System Actions.
Of course, the connection can be used Window, Linux, android and other derived resources.
How to upgrade your VPN on iPhone
You can choose from various features and options to make your server work even more customizable.
▶ Set up quick turn on and disabling VPN using a shortcut or widget on the desktop, follow these instructions.
▶ Set VPN rules for sites and services so that traffic goes directly without an overseas tunnel in this way.
▶ Enable VPN for multiple apps on the iPhone, a special communication command will help.
Your iPhone will now connect to the VPN on a schedule, while using apps, or simply filter traffic by traffic.
Source: Iphones RU
I am a professional journalist and content creator with extensive experience writing for news websites. I currently work as an author at Gadget Onus, where I specialize in covering hot news topics. My written pieces have been published on some of the biggest media outlets around the world, including The Guardian and BBC News.
: Everything we know a week after its release")


