


Want to get the most out of your Android camera? No problem. With a few simple adjustments, you can greatly improve the quality of your photos. Here we will show you How set up your android mobile phone camera correctly to achieve incredible results, regardless of whether you have a high-end or mid-range device.
Image Resolution
The first thing you need to do is set your camera resolution as it determines the number of pixels in your image. One megapixel (MP) is equivalent to one million pixels; More megapixels allow you to take higher resolution photos. The higher the resolution, the more detailed the photo will be, although it will also take up more space in the device’s memory. Common MP ranges you can find:
- Login phone numbers: 8 MP to 12 MP
- Mid-range phones: 12 MP to 48 MP
- High-end phones: 48 MP to 108 MP
Recommended Videos
For most users, a range from 12 MP to 50 MP is sufficient to obtain high-quality photos. For professional photographers who require significant cropping or large prints, the 64 to 108 MP range may be more suitable. However, remember that quality also depends on lighting and processing.
White balance

White balance adjusts the colors in your photos so they look natural based on the ambient lighting. Your smartphone camera usually makes this adjustment automatically (automatic white balance, AWB). Although AWB works well in most situations, sometimes it may not meet your expectations or require special settings. In such cases, you can adjust the white balance manually in the camera app.
Available options usually include:
- Auto– Detects ambient light and adjusts colors, ideal for most situations.
- daylight: Useful in sunny weather for more natural colors.
- Cloudy: Improves colors on cloudy days or in diffuse light.
- fluorescent: Ideal for photos taken under fluorescent lighting.
- Incandescent lamp: Adjusts colors under incandescent lighting.
If you’re unsure, Auto mode usually works well, but in certain situations, using these modes can make colors appear more realistic.
Exposure control

Exposure is the key to controlling the amount of light entering the camera. The correct settings will prevent your photos from coming out too dark or too bright. On most Android cameras you will find a slider to adjust the exposure. Here’s how to use it:
- More light (increase exposure)– Useful in the dark or on cloudy days, but be careful not to overexpose the image.
- Less light (reduce exposure): Ideal for sunny days or bright scenes when you want to avoid losing detail due to excess light.
Try adjusting the exposure while looking at the screen to see the effect in real time.
Manual or automatic focusing
Autofocus is the default setting on most mobile phones and is ideal for capturing spontaneous moments. However, you can use manual focusing to get more accurate results, especially in detailed photos such as close-ups or portraits.
- Auto: The phone quickly adjusts focus. Ideal for photos on the go or when you don’t have time to set up.
- Management: Some cameras allow you to adjust the focus by moving a control or touching the area you want to focus on. This is useful for macro photographs or portraits where you want a specific subject to be sharp.
Using the Flash

Flash can be useful in low light conditions, but use it sparingly. This may result in details being overexposed or harsh shadows appearing. Only activate it when you really need it, and be sure to test with and without flash to determine which option is best based on your environment.
Typical configurations:
- Auto: The flash only activates when the camera detects low light. It is ideal for most nighttime situations.
- Activated: The flash activates every time you take a photo. Use with caution as it may overexpose the image or create unflattering shadows.
- Defective– Useful in well-lit areas or when you prefer to use natural light.
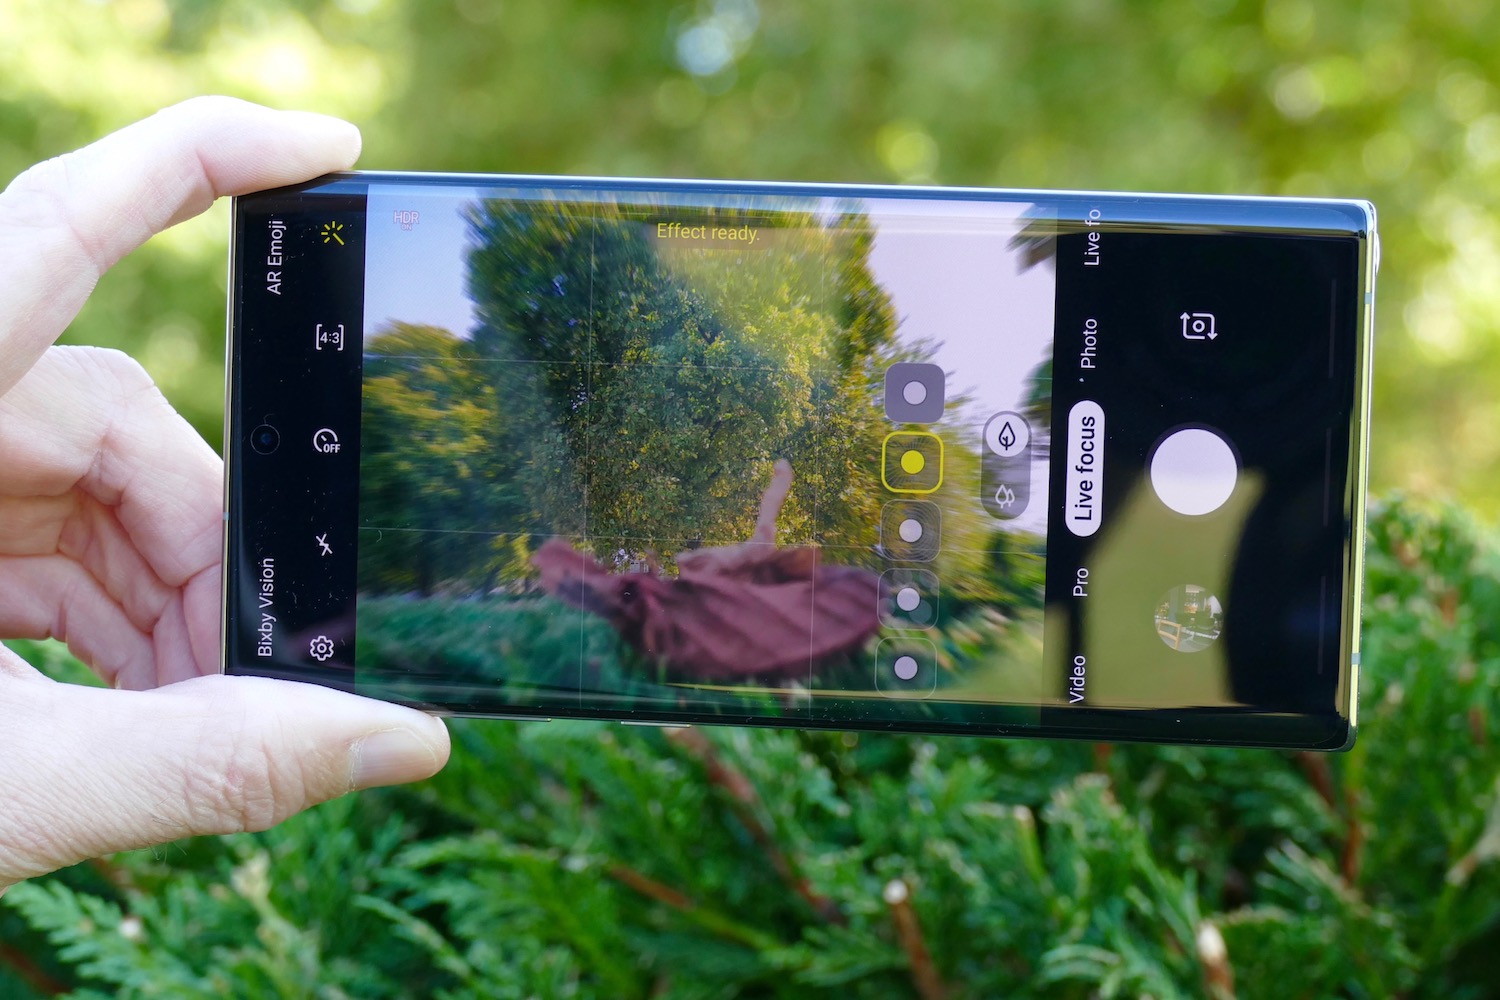
Advanced Features
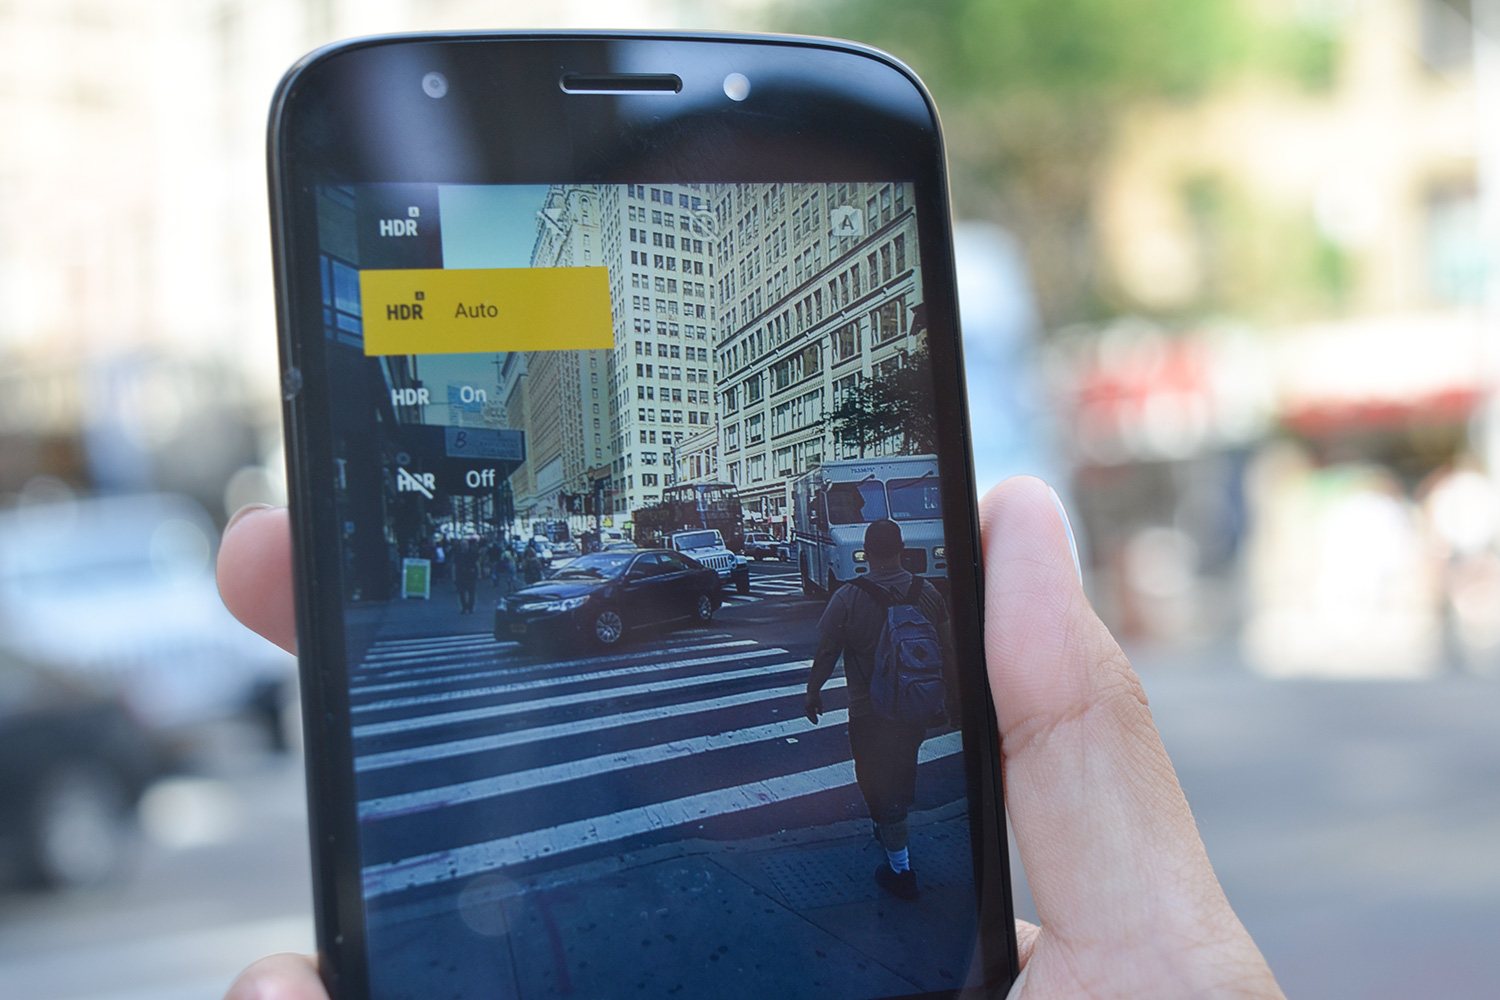
Many Android phones have additional features that can help you enhance your photos even further, such as HDR mode, timer, or image stabilization. These tools are perfect for different situations, so don’t hesitate to try them out and see what kind of results you can achieve. Advanced features you can find:
- HDR (High Dynamic Range): Helps balance light and dark areas in high-contrast photos such as sunsets or landscapes.
- Timer: Ideal for taking photos without having to hold your mobile phone.
- Image stabilization– Reduces camera shake for sharper photos.
Video settings

If you also like to record videos, be sure to set the resolution and frame per second (FPS) to make the recording smoother and clearer. For smooth playback, select at least 30 frames per second. If you want to record in slow motion or fast motion, consider options like 60 fps or even higher. Most Android phones allow you to record in Full HD and even 4K for maximum quality.
Source: Digital Trends


: Everything we know a week after its release")


