


Last week the final version of macOS Sonoma was released. We tested the system almost all summer after the WWDC presentation and are already using the final brand lightly. I haven’t noticed any glitches or complaints, you can safely update.
Topic: 7 New macOS Sonoma Features You Need to Try After Installation
Now let’s see how to do a clean installation of the system so as not to delete all the cache and system junk from the latest version of macOS.
1. Back up your data to Time Machine.
Before completely reinstalling the system, you need to save all the necessary data so that you can quickly return documents, remaining data and other important files to your Mac.
The easiest way to do this is with a built-in backup system. Time Machine. All you need is an external drive of sufficient capacity. You can see the used space on your Mac along the way System Settings – General – Storage.
► Connect the external drive to your Mac using a cable.
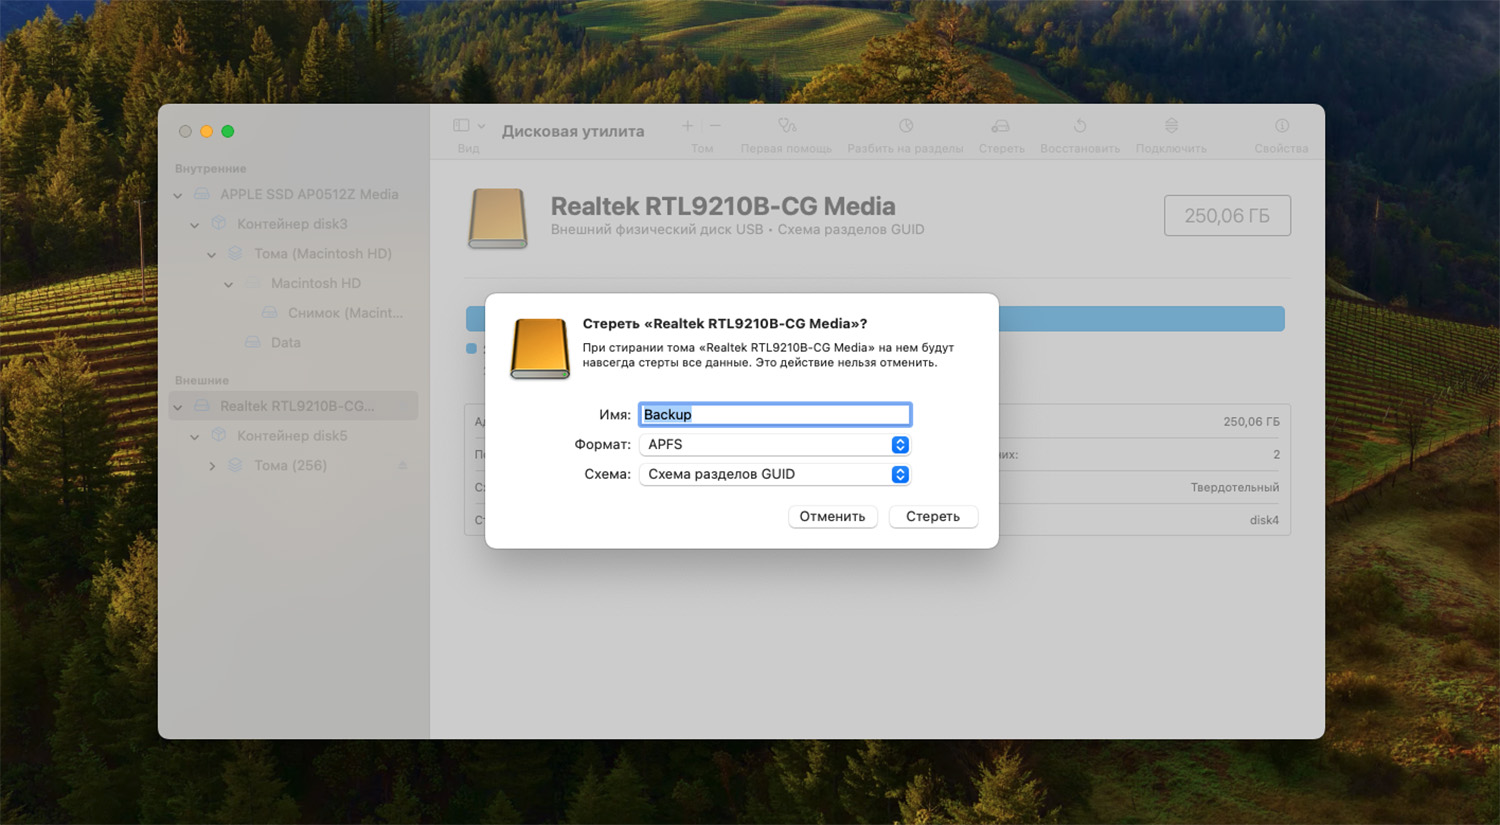
► If necessary, format the drive via the application. Disk Utility (you can find it through Spotlight or in Launchpad).
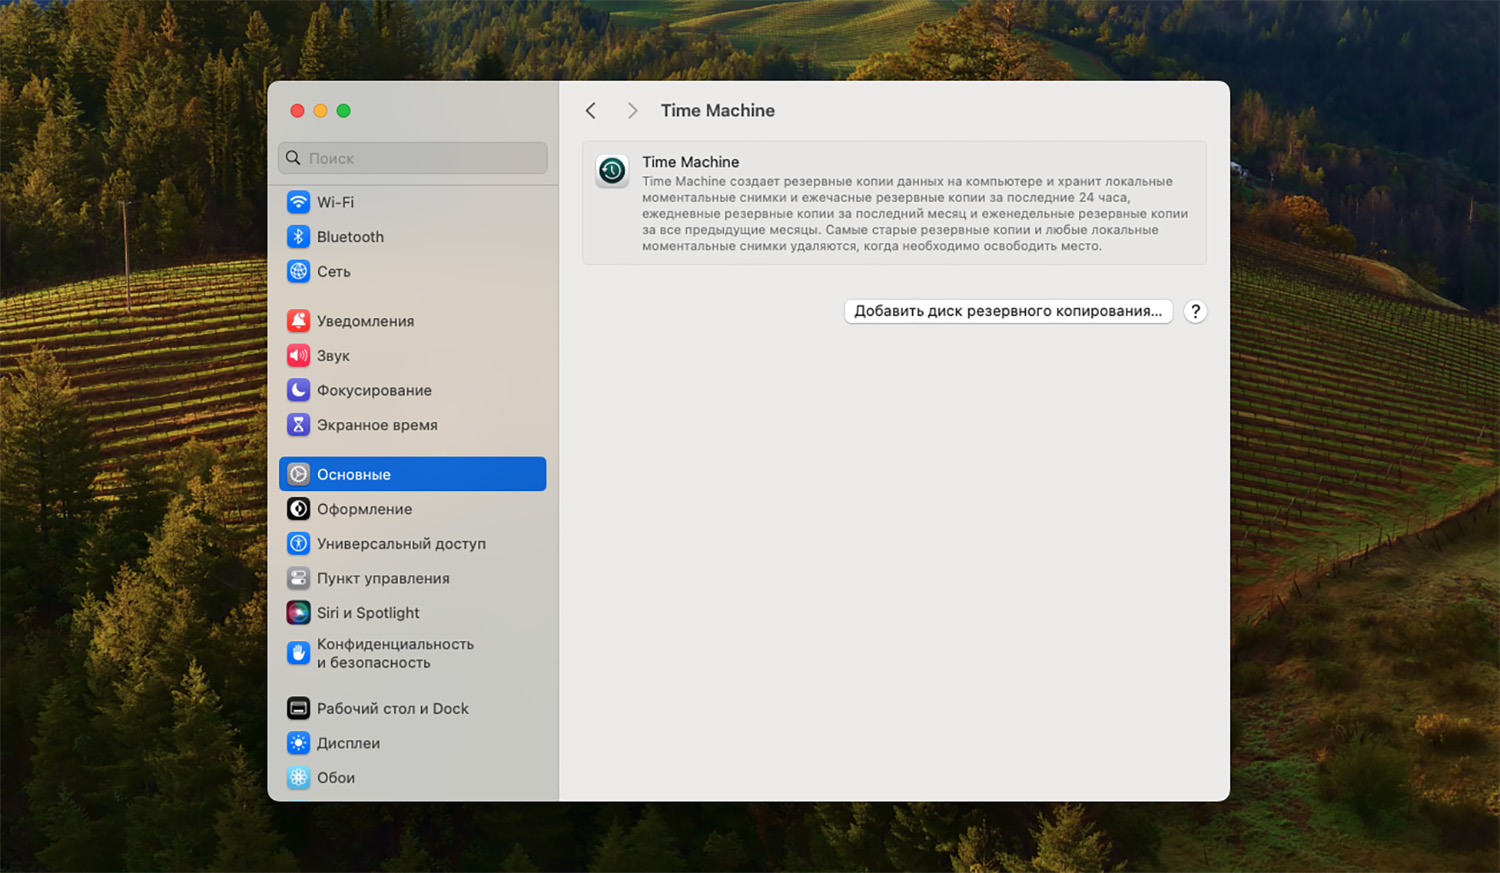
► open section System Settings – Basic – Time Machine and select the disk as the backup storage location.

► Set up encryption of copies if you are worried that the drive may fall into the wrong hands.

► In a minute, start creating a new backup.
2. Save files to the cloud or locally.
If for some reason you decide to perform an incomplete system backup, important data can be saved on disk or in the cloud. Both third-party services and iCloud.
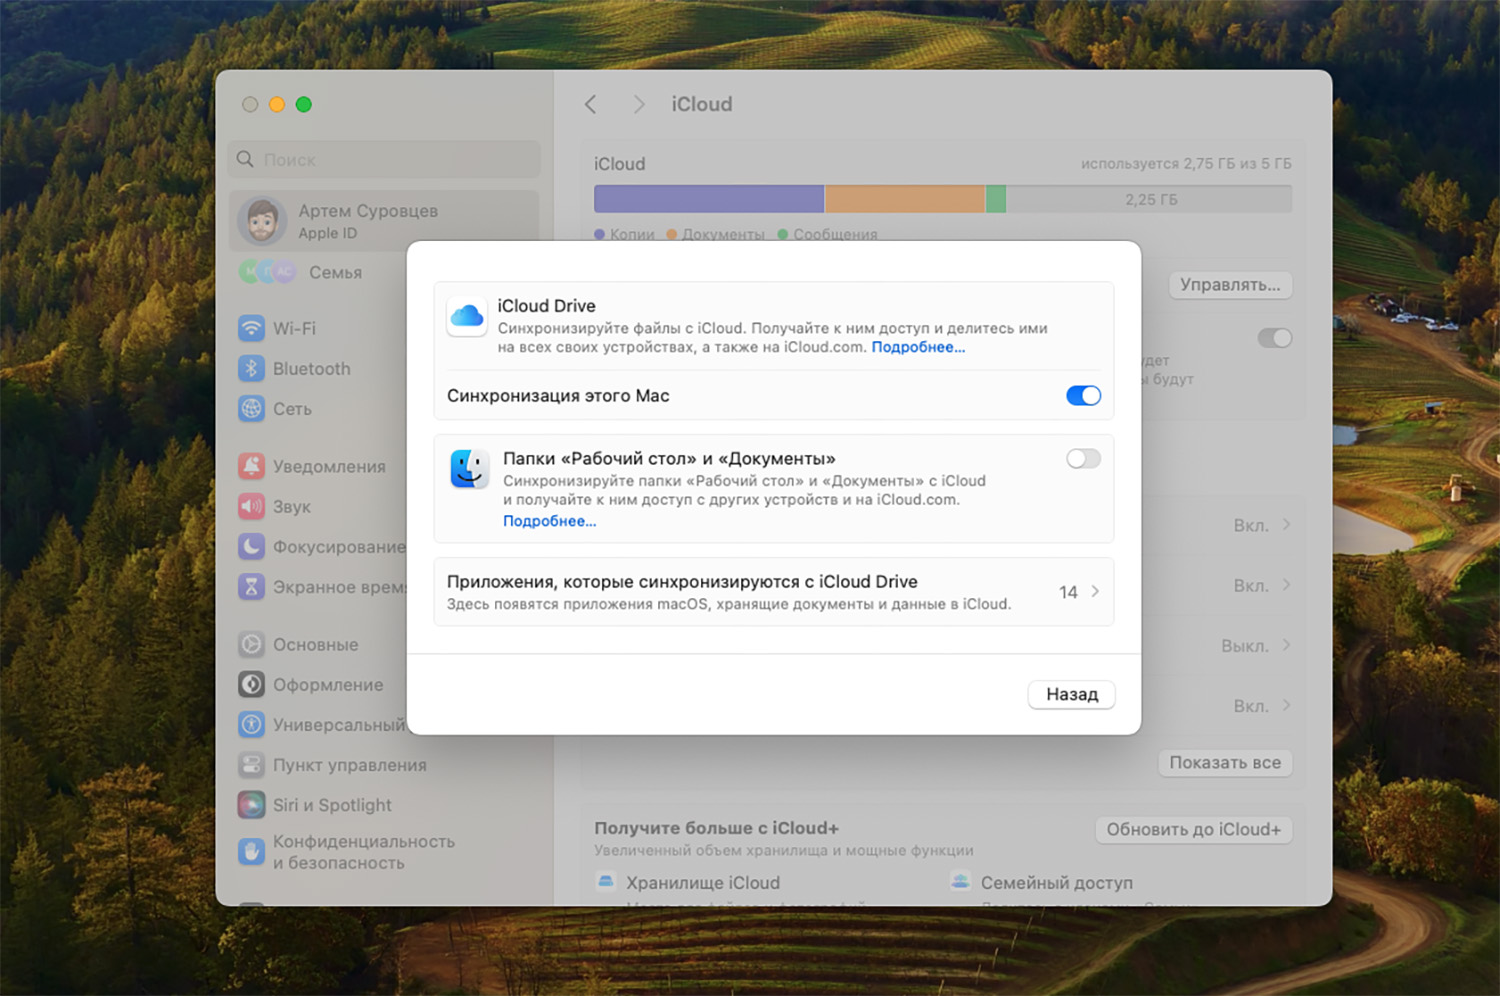
► Go to System Preferences – Apple ID – iCloud.
► Click Show all – iCloud Drive.
► Activate the item Desktop and Documents folders.
► After that, you can put all the necessary data in these folders and wait for the synchronization to complete.
If the place is in iCloud There is not enough other available cloud or data storage on the drive.
3. Unlink your Mac from your Apple ID.
During the process of installing macOS from scratch, problems arose with binding to the Apple ID. Sometimes everything goes smoothly, the security system begins to sound the alarm and prohibits erasing data, sometimes disabling the account. It is better to unlink your computer from your Apple ID in advance.

▶ In the browser, an external Apple account management site.
▶ Log in when registering help, in the menu and in the menu. Devices.
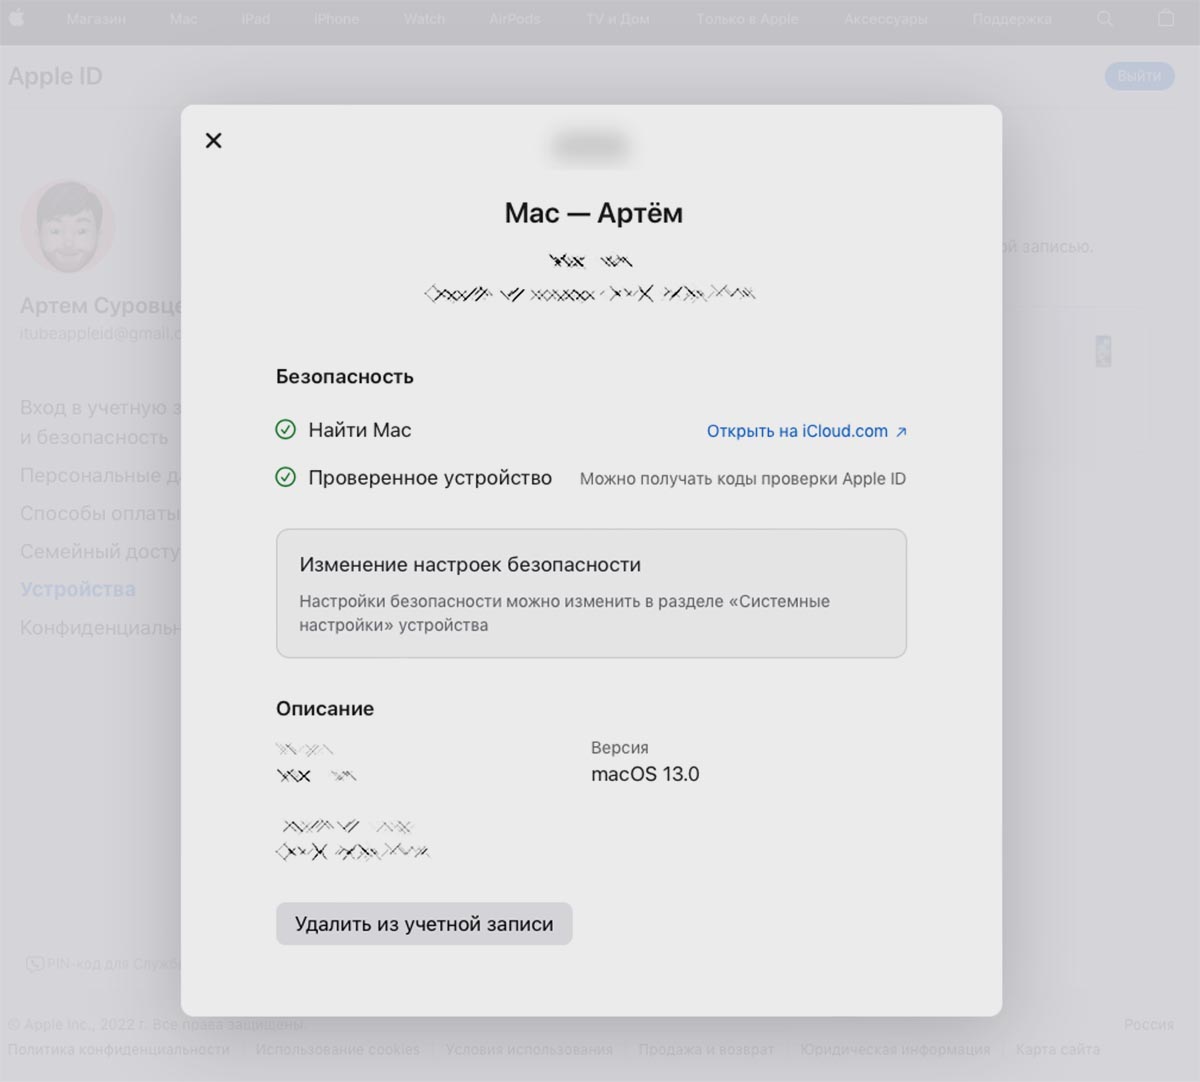
▶ Find your Mac and click Remove from account.
4. Create a system installer through recovery mode.
When all the backups are made, it’s time to move on to installing the system.
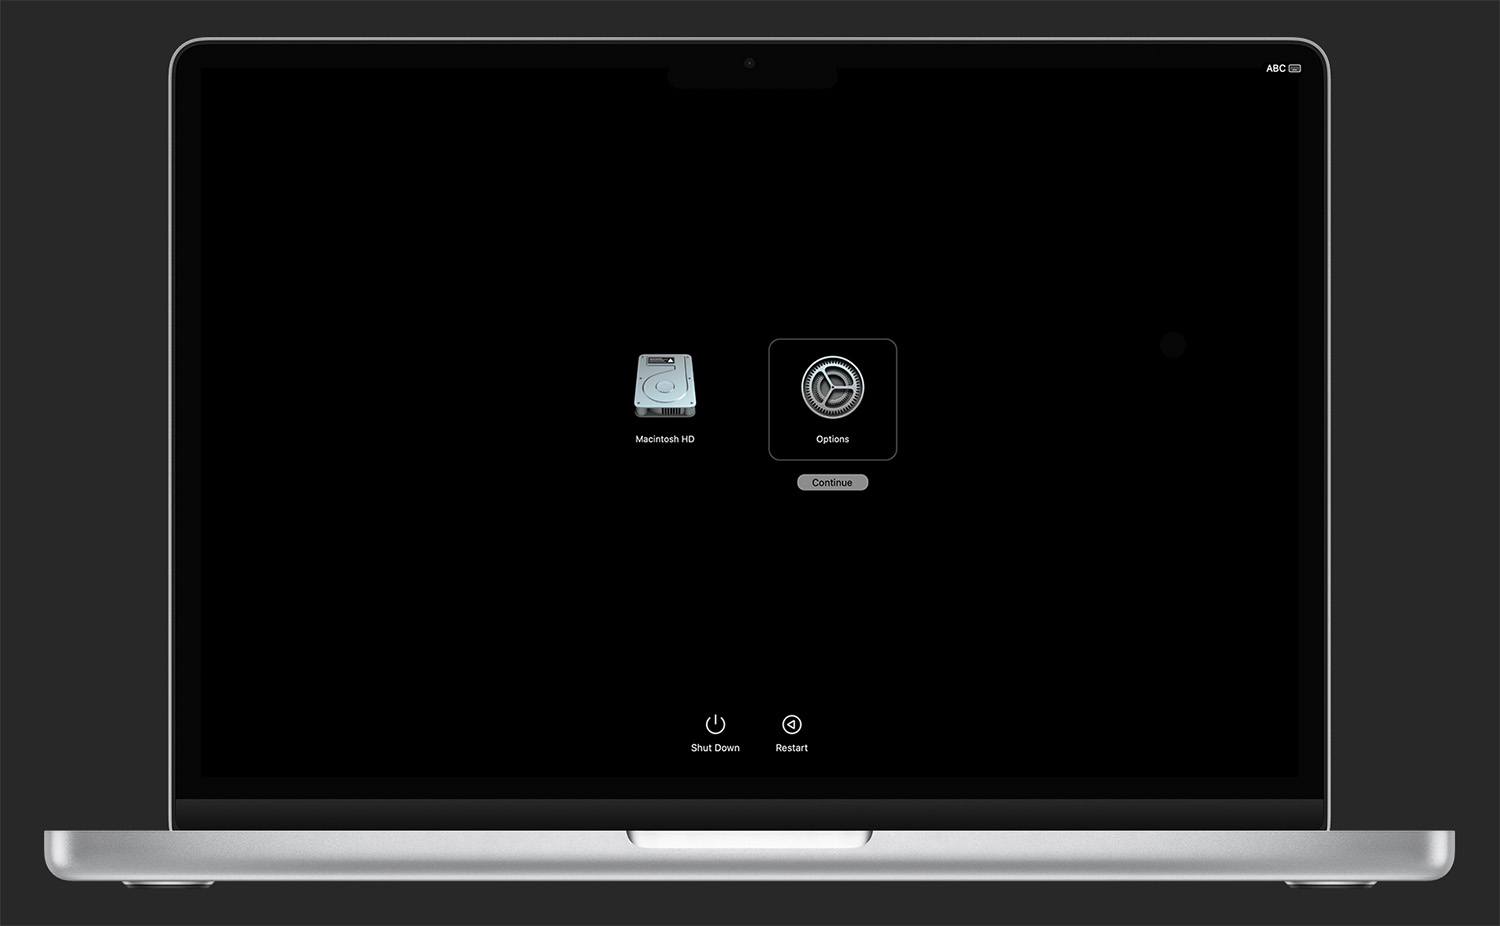
▶ Restart your computer and press the key combination when turning it on. Command + Option (Alt) + R (on a Mac with a processor Intel) or hold the power button before the captions are displayed Loading launch options (on a Mac with a processor Apple).
▶ After booting into recovery mode, select from the menu bar Disk Utility and format the system disk.
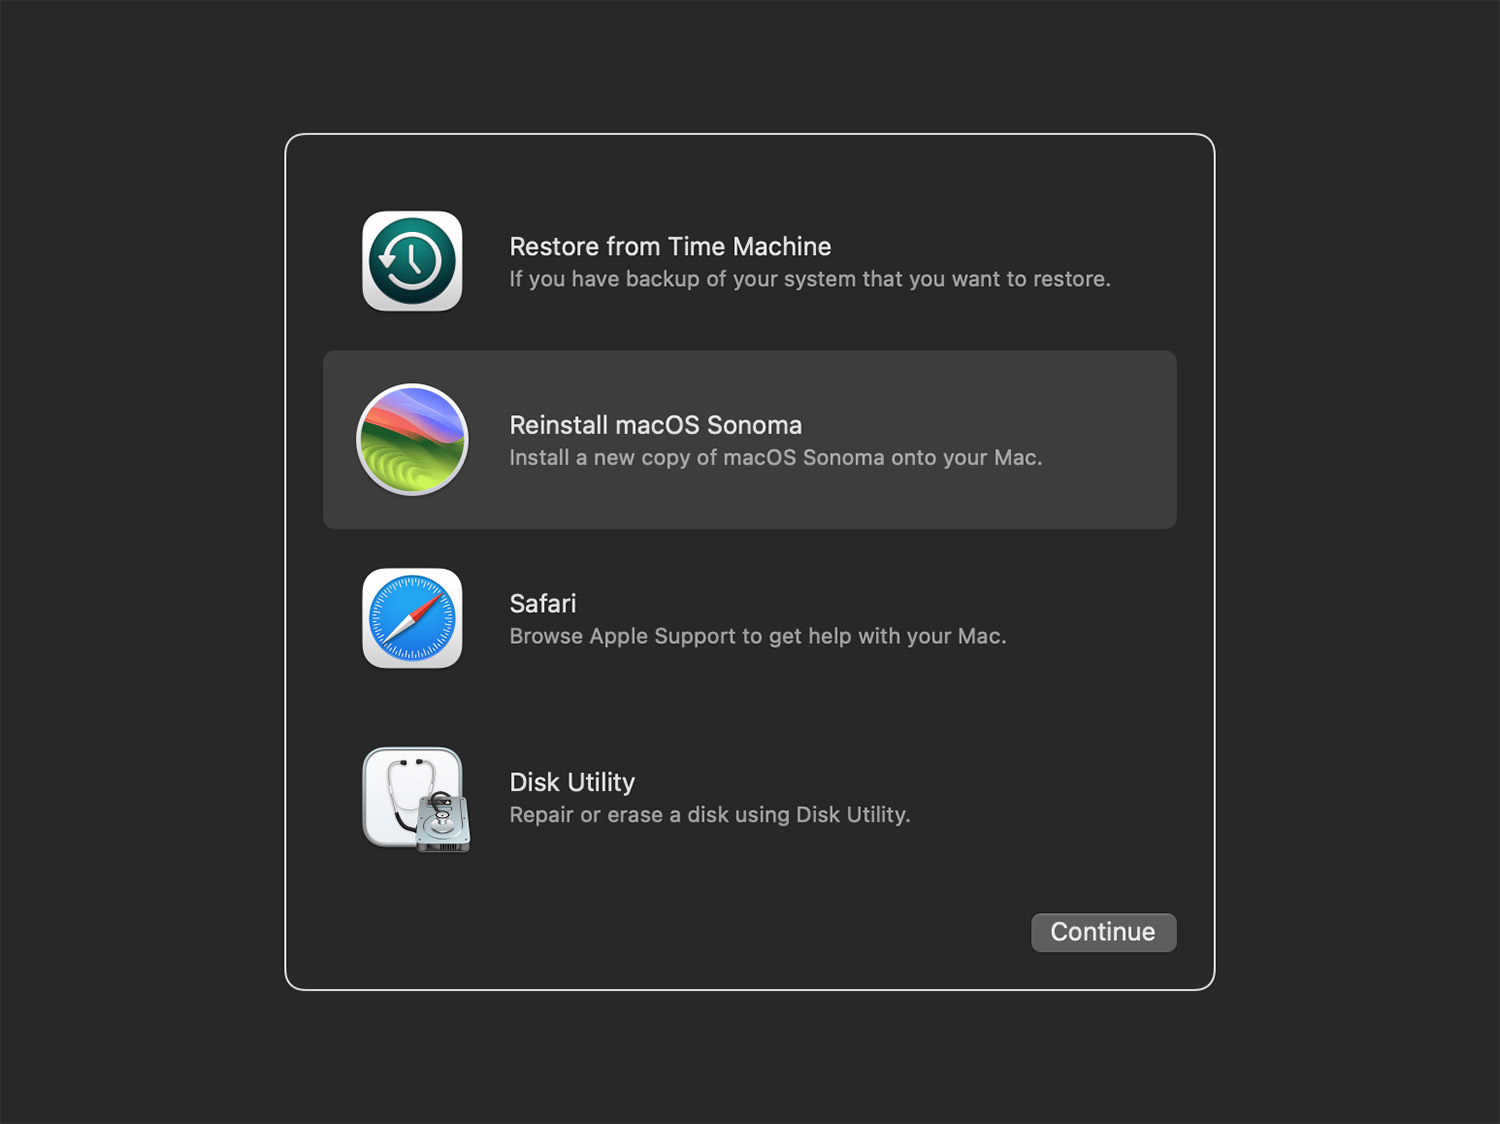
▶ Return to the main system recovery menu and select the option. Reinstall macOS.
▶ Follow the installation by an experienced technician.
During the reinstallation, the image system will be uploaded to the network. A stable internet connection is required. If you are worried, you can make a bootable USB flash drive in advance and install the system with it. Here are our rules for this.
▶ After installing the system, you can return a previously created backup or data from the cloud.
Now you know how to reinstall macOS Sonoma and transfer important files, settings, or applications.
Source: Iphones RU
I am a professional journalist and content creator with extensive experience writing for news websites. I currently work as an author at Gadget Onus, where I specialize in covering hot news topics. My written pieces have been published on some of the biggest media outlets around the world, including The Guardian and BBC News.
: Everything we know a week after its release")


