


Just like PC browsers, Safari has the feature of browsing in an incognito tab. With him, You can access pages without using your data stored in your browser profileand at the same time not everything sent is recorded in a history.
To increase security, it is also possible to configure anonymous browsing only through the Face ID feature. For those who don’t know, this is the iPhone’s facial recognition mechanism.
And today TecMundo Teaches you how to configure Face ID so that the Safari incognito tab is enabled only with identification. Check out!
How to enable Face ID in Safari?
First, you need to enable Face ID security verification on your iPhone. Moreover, this feature is only available on devices compatible with Apple’s current system, iOS 17.
1. Go to “Settings” on your iPhone;
2. Once there, access the Safari option as shown in the image below;
3. Next, scroll down to “Require Face ID to Unlock Private Browsing” and turn the switch to the side, leaving it green to activate;
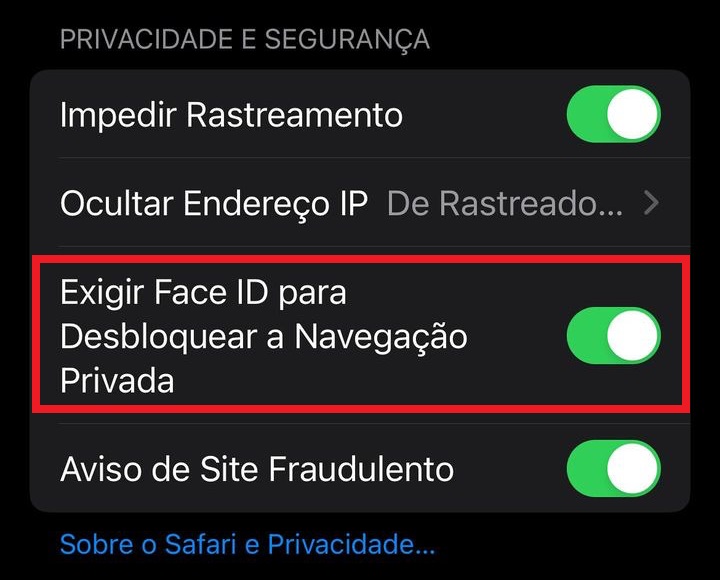
4. That’s it, now your Safari is configured in such a way that authentication via Face ID is required whenever the incognito tab is activated.
How to open an incognito tab in Safari?
After doing the above operation, Every time you browse to an incognito tab in Safari, you’ll be asked to identify yourself using Face ID. So, if you close the app, switch to another app, or even lock the iPhone screen, you will need to perform face authentication.
1. Open the Safari app on your iPhone;
2. Once there, press the icon with two overlapping window designs located at the bottom of the screen on the right as shown in the image below;

3. Then click “Home” at the bottom of the screen;

4. Then click on “Custom” to change the type of navigation to use;
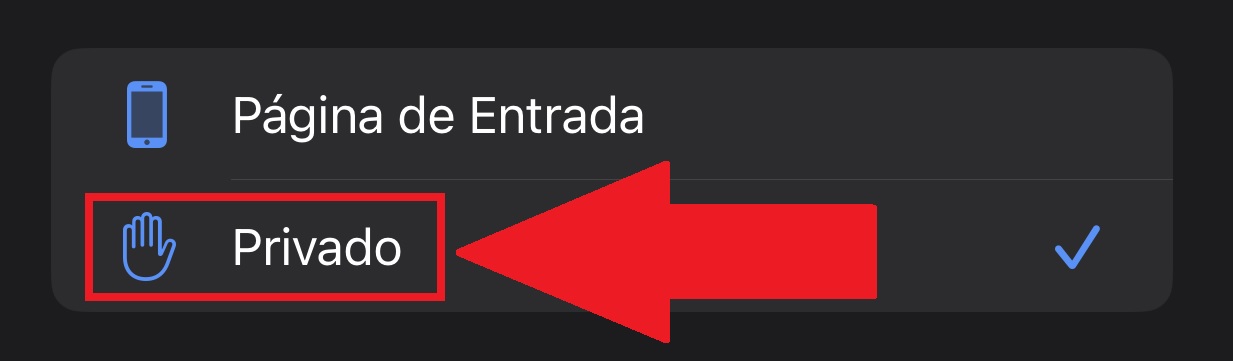
5. Now press “OK” to confirm the change;
6. Next, authenticate via Face ID to verify that you are the one browsing in private mode;
7. An alert will appear on the screen confirming that navigation is now configured as private;

8. That’s it, now you can access websites and pages anonymously from your iPhone.
Now that you know how to browse privately in Safari, you don’t have to worry about your data being collected or reused on certain websites.
Did you like the content? So, follow the portal and stay tuned for tutorials coming out here every week. To the next one!
Source: Tec Mundo
I am a passionate and hardworking journalist with an eye for detail. I specialize in the field of news reporting, and have been writing for Gadget Onus, a renowned online news site, since 2019. As the author of their Hot News section, I’m proud to be at the forefront of today’s headlines and current affairs.
: Everything we know a week after its release")


