


Premiere Pro is one of the most used video editors in the world. And one of the main reasons for this popularity is the possibility of editing video in high definition, with support for resolutions that can reach up to 8K. And so, software consumes most of your PC’s hardwaremainly RAM memory and video card.
Therefore, its execution may cause the application as well as the entire operating system to slow down. To help you with this, today we bring you a series of tips to solve the problem of Adobe Premiere Pro slowing down or freezing on your computer. Check out!
Configure the amount of RAM the program will use
Premiere Pro is an application that consumes a lot of RAM. If you have a limited amount on your computer, you can configure how much of it is used during video editing, thus prioritizing the software over other activities on the computer. See how:
1. Open Adobe Premiere Pro on your computer;
2. Create a new project or open an existing project;
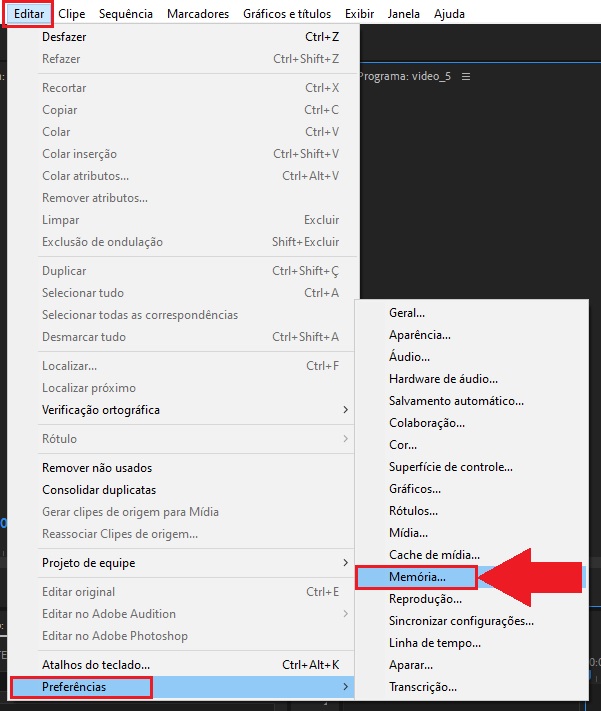
3. In the editing area, click “Edit” in the top menu;
4. Then click on “Preferences”;
5. In the next menu, click “Memory”;
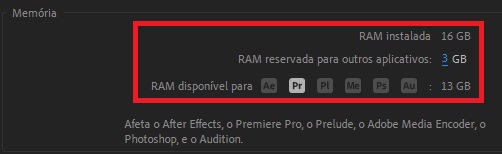
6. On the screen that opens, you can see how much RAM you have installed on your PC and how much of it you want to use in Premiere Pro. In this case, it is recommended to use a good number, thus preventing crashing problems during video editing.
However, if you have a considerable amount (around 32 GB or more of RAM) it is possible to reserve half of this total to achieve good performance, without interfering with other tasks on your PC.
7. After making the changes, click the “OK” button.
8. That’s it, now just restart Premiere Pro for the changes to apply.
Deleting cache files
Another feature that helps a lot with performance is deleting Premiere Pro’s cache files. Just like with browsers, They store information in the computer’s memory so it can be accessed more quickly when needed.
However, the excess of these files may cause a slowdown in running the program. Here’s how to solve this:
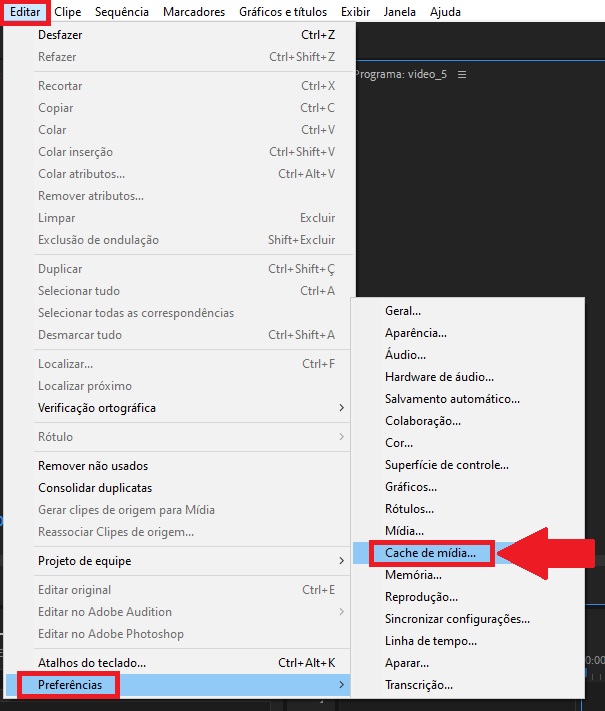
1. With Premiere Pro open, go to “Edit” in the top menu;
2. Then click on “Preferences” and in the next menu select “Media cache” as shown in the image below;
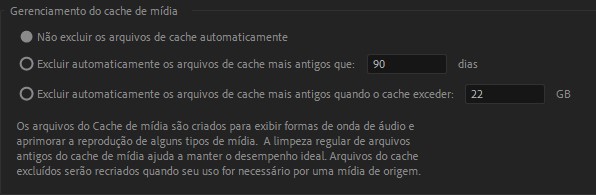
3. On the screen that opens, click the “Delete” button to remove all temporary files;

4. You can also configure the application to remove these files within a certain period of time or when you reach a certain amount of GB on your computer’s storage;
5. Now press the “OK” button and restart Adobe Premiere Pro for the changes to take effect.
Reducing viewport quality
Other items on your PC that consume a lot of memory and other resources is the video displayed in the edit. In other words, showing the progress of your project. By reducing the quality, you can also reduce the amount it demands from your hardware without compromising the final project. Check out:
1. Launch Premiere Pro on your computer;
2. Open an existing project or start a new project from scratch;
3. Now on the main editing screen, click on the icon with the split value and reduce the quality to 1/4, making the video a quarter of the quality of the main project;
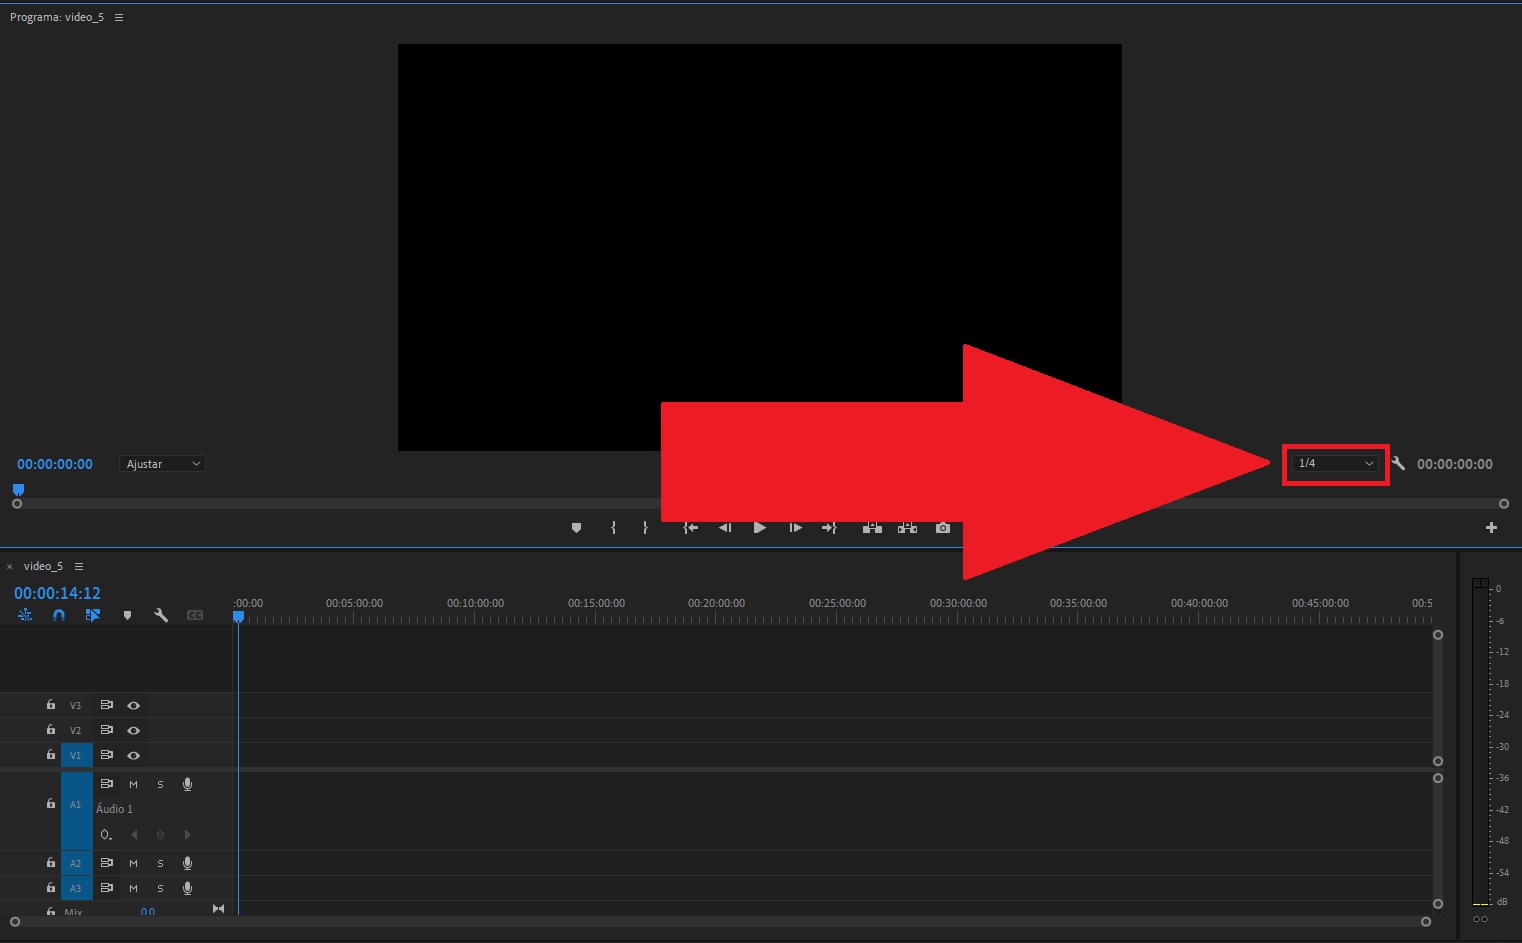
4. Then click on the screwdriver icon next to the quality icon;

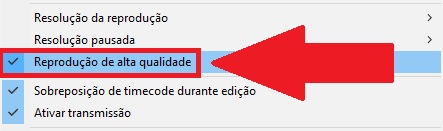
5. Once in the menu, uncheck the “High quality playback” option so that the video consumes less resources;
6. That’s it, go back to editing the project; will automatically apply the changes.
Now that you know how to fix slow Adobe Premiere Pro issue, you no longer have to worry about any crashes during your editing work.
So do you have any questions? Tell us about TecMundo’s social networks. To the next one!
Source: Tec Mundo
I am a passionate and hardworking journalist with an eye for detail. I specialize in the field of news reporting, and have been writing for Gadget Onus, a renowned online news site, since 2019. As the author of their Hot News section, I’m proud to be at the forefront of today’s headlines and current affairs.
: Everything we know a week after its release")


