Google announced last week that it has started releasing the Magic Eraser tool for its users. It involves removing items from photos stored in the Google Photos app for both iOS and Android, without the need to use any other software for it.
Until then, the tool was exclusive to Pixel 6 and 7 smartphones, but now any user will be able to enjoy the features. Despite everything, only available to Google One subscribers – The company’s cloud storage service starting at R$6.99 per month on a 100GB space plan.
Thinking to let you know how to delete items from photos with Magic Eraser from Google One, we have put together a complete step-by-step guide. To follow!
After all, how to subscribe to Google One?
For those who don’t know, the service includes Google Photos, Google Drive, Gmail, etc. It brings a cloud storage that can be used by several company applications in the same account, such as
If you don’t have a plan yet, we’ll show you the step-by-step process of subscribing. Check out!
1. Go to the official Google One website;
2. Sign in to your Google account where the subscription will be made;
3. Once there, scroll all the way down the page and then click on “Check plans” as shown in the image below:
4. Next, choose one of the three plans available on Google One. Note that you can choose between a monthly payment or an annual plan. Values:
- Basic 100GB – R$6.99 per month / R$69.99 per year;
- 200GB Standard – R$9.99 per month / R$99.99 per year;
- Premium 2 TB – BRL 34.99 per month / BRL 349.99 per year;
5. Click on the blue “Let’s get started” button to subscribe;

6. On the next screen choose a payment option and fill in all the required information;
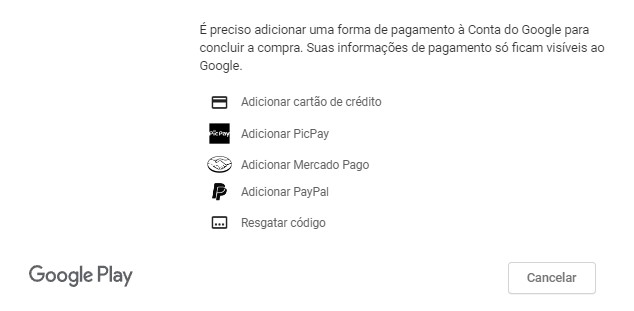
7. After the payment is confirmed, you can start enjoying Google One features.
How to use Magic Eraser on Google One?
1. Open the Google Photos app on your mobile device;
2. While you’re there, make sure you’re signed in to an account with a Google One subscription;
3. Then select the photo from which you want to remove one or more items;
4. Now click on the Magic Eraser icon located at the bottom of the screen;
5. Circle the item in the picture that you want to remove from the photo;
6. Then the app will auto-remove using artificial intelligence to fill the space;
7. After making the changes, save the image and use it as you wish.
Now that you know how to use Google One’s Magic Eraser, you can erase unwanted elements from your photos without having to resort to third-party apps. And you, did you have any questions? Tell us on our social media!
Source: Tec Mundo
I am a passionate and hardworking journalist with an eye for detail. I specialize in the field of news reporting, and have been writing for Gadget Onus, a renowned online news site, since 2019. As the author of their Hot News section, I’m proud to be at the forefront of today’s headlines and current affairs.

