
")


Recording the computer screen may be necessary in many situations, such as during an important lecture or when you need to create tutorials to teach others how to perform a procedure on the computer.
A very interesting application for this purpose, clip championWe’ve brought you a complete tutorial on how to use it so you can learn more about the software, which recently came pre-installed in Windows 11, and how to record your device’s screen.
Check it out below!
1. Download or go to the app website
You can download the application to your computer or use the web version to record your screen with Clipchamp. For those running Windows 11 on their computers, the software is probably pre-installed on the machine.
In any case, if you choose to download the app, go to the Microsoft Store and search for it in the search bar. However, if the online option is more interesting, click here to be redirected.
2. Create an account on the platform
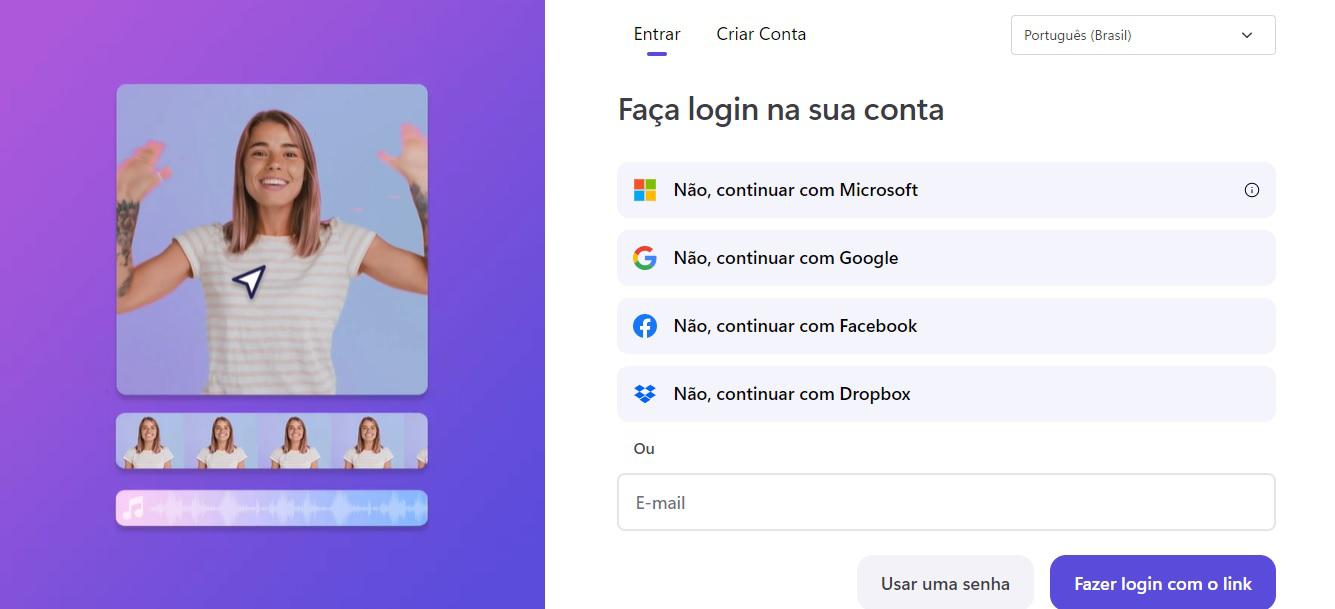
To use the tools available on Clipchamp, you need to create an account on the platform. So choose between creating the registration using a Google or Microsoft account, or if you prefer, do it manually by entering information such as name, email and password.
3. Record your computer screen
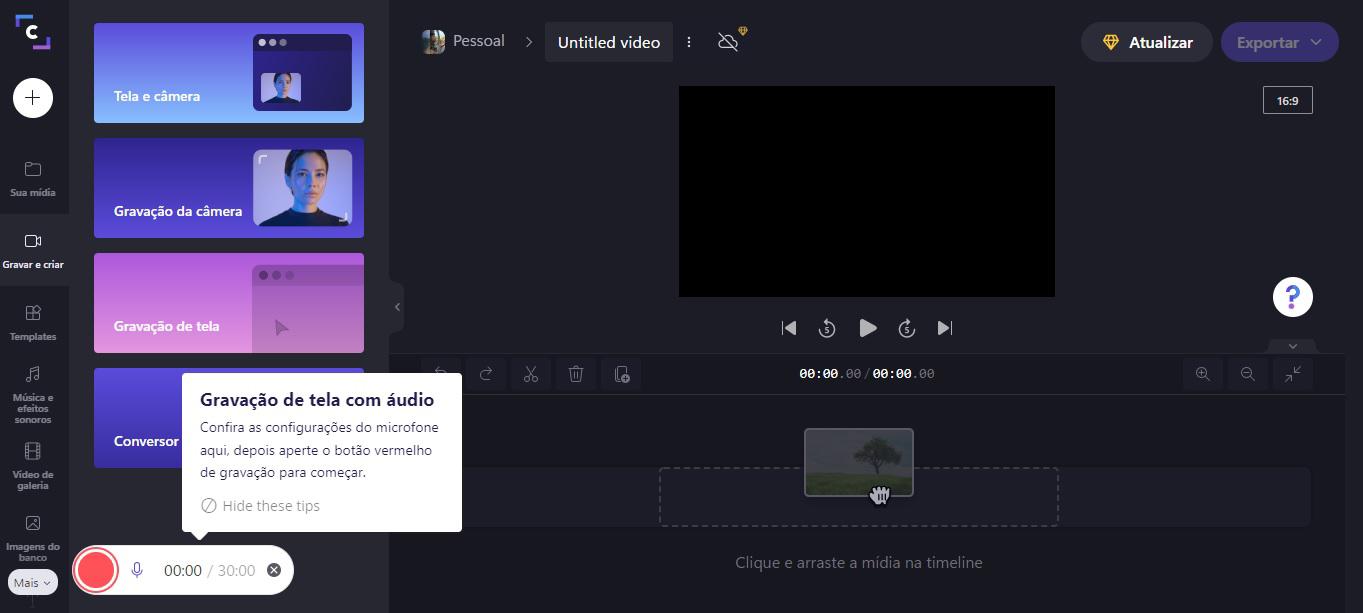
in the area “Start with a recording”, Click “Screen” to access the software studio and access the necessary tools.
This option is designed for those who only want to record their computer screen without using the webcam. Once you are in the studio, you have to click on the microphone icon located in the lower left corner and decide whether you want to capture your voice or just record the screen as a usage tutorial.
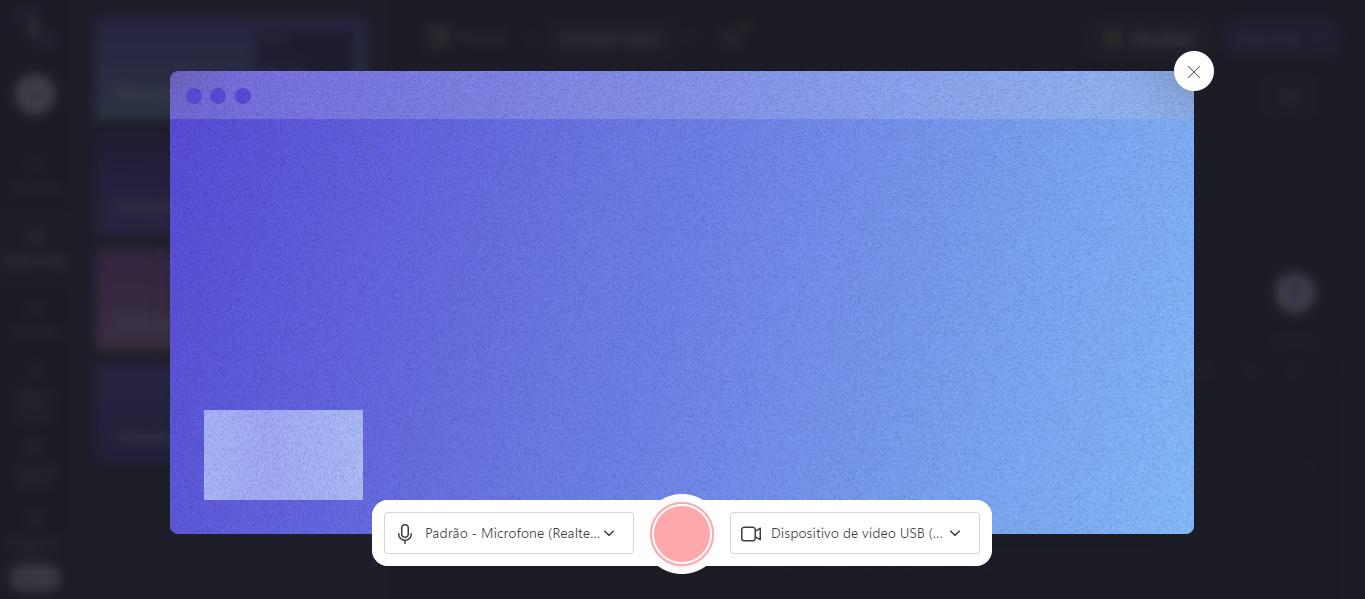
Later, click the red button, next to the microphone icon. A new screen will appear and you must choose whether you want to record the entire computer screen, just one application tab, or one of your browser’s open tabs.
Also, check the box if you need to record the content with audio. “share system volume”. After a short while, select “share” to start recording.
It’s important to note that the free version of Clipchamp lets you record a video. maximum time 30 minutes. If you need more time, you will have to start a new recording or subscribe to one of the premium plans available on the platform when the other one is finished.
4. Record your computer screen with your image
In some situations, such as games or business presentations, you may need to record the computer screen with your picture. To do this, click on “Screen and camera” in the field, immediately after completing the recording in Clipchamp. “Start with a recording”, it will be redirected to application studio.
The software will automatically ask for permission to start your webcam. Authorize the permission and check your image in the left corner of the screen. When you’re ready to start recording, click the red button in the middle of the page, choose whether you want to record the entire screen or just an app, and start speaking.
As with the previous option, the recording time limit is 30 minutes.
5. Download the recording
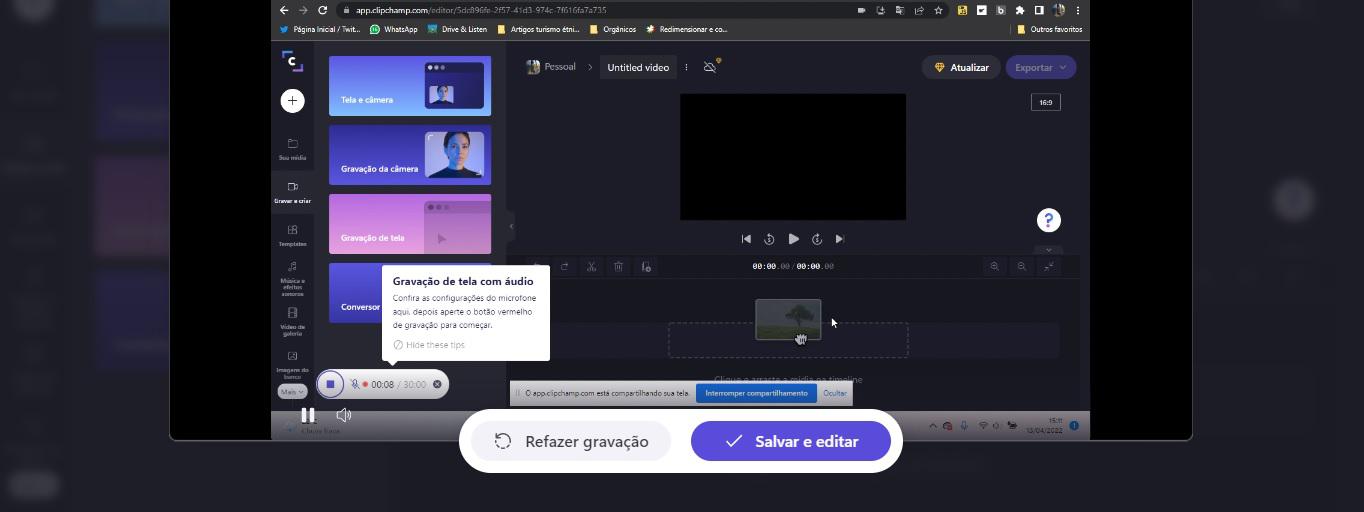
Click the “Stop Sharing” button to stop the screen recording. After a short time, you will need to save the file to your computer so that you do not lose all the work done so far.
Therefore, choose “save and edit” and Select the folder on your device where you want to save the video. At this point Clipchamp will also direct you to the editor where you can make edits such as cuts, filters and more.
Source: Tec Mundo
: Everything we know a week after its release")


