How to transfer data from Windows PC to Mac
If you bought a new Mac and are worried about the information on your Windows PC, here we show you how to transfer it safely step by step.
Thinking of buying a Mac in 2024? Are you worried about losing your data on your Windows PC? The first answer is up to you, and we will answer the second answer with this article. we will teach you how to transfer data from Windows PC to Mac. It is possible Thanks to the Migration Assistant in macOS If you are very questioning this change where contacts, calendars, email accounts and other data are transferred from your PC to Mac, we also give you 5 reasons to switch to Mac.
- What do I need to transfer my data from my computer to my new Mac?
- Transfer information from PC to Mac
- This is information transferred from Windows to macOS
- The transfer did not take place, what can I do?
What do I need to transfer my data from my computer to my new Mac?
On both Mac and Windows PC, they need to be updated to the latest version of the operating system.in this case, on Mac, update to the latest version (currently macOS Sequoia) and on Windows, update to Windows 10 or 11.

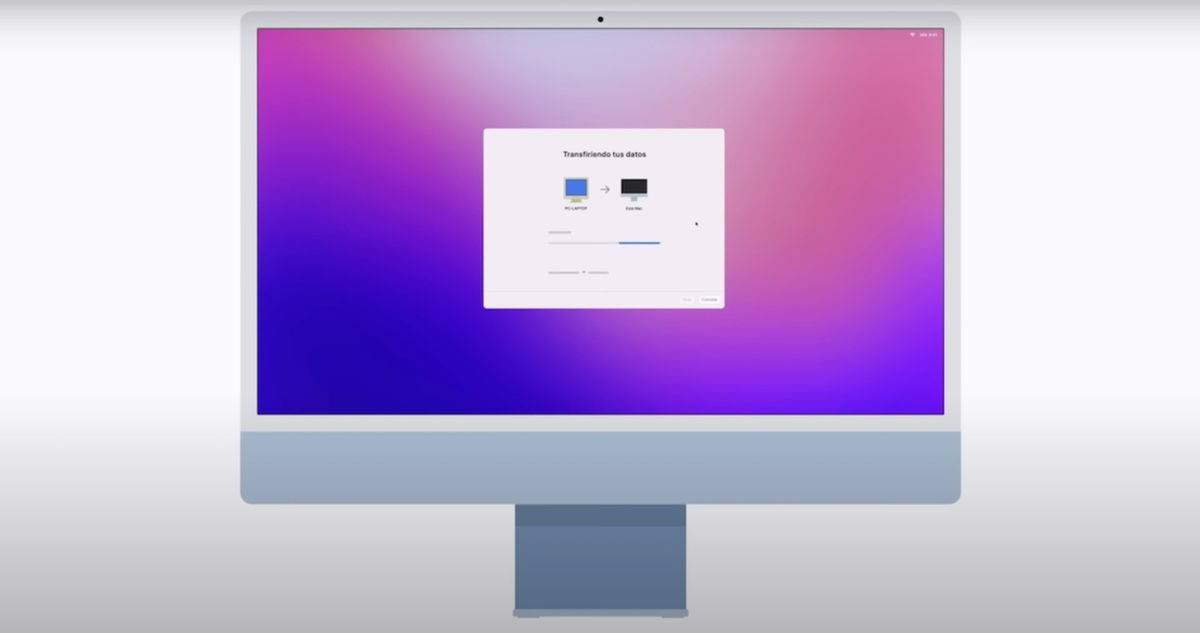
Windows 11, left; macOS is on the right of the image.
If you have any antivirus software, firewall, or VPN on your computer, disable them for now because they may interfere with the transfer procedure. Moreover Make sure Wi-Fi is enabled on both devices and they are connected to the same network.. If you don’t have Wi-Fi, you can connect to the network via Ethernet or connect both devices with an Ethernet cable.
Have your Windows administrator and login information handy and connect your devices to power. Are we ready?
Transfer information from PC to Mac


- To switch from PC to Mac, go to the link below
- on the website Click on the link that will take you to the Migration AssistantCheck the compatible connection of the installed version of macOS
- The relevant application will be installed immediately
- Close all processes and applications you are running and let’s focus on the wizard
- If you have Windows automatic updating enabled, you will be asked to disable it to continue.
- Now we go to Mac and You must select Migration Assistant during configurationThis is when it asks us if we have information to pass on and We select the option From a PC with Windows
- Select the relevant computer and click Continue
- A 6-digit code will now appear on your Mac and PC.
- If they match Click Continue on PC
- This process may take several minutes as the wizard collects all available information; confirm Continue on your Mac to continue
- Create a new administrator password on your Macenter the same password twice to confirm and identify
- When confirmation is activated with a green circle On Mac you can click next to the username Continue to start data transfer
- Do not use equipment while transfer is taking place
- Once finished, the Mac will restart and indicate that the migration was successful.Restart once again by clicking OK
- Confirm by clicking OK in the Migration Assistant on a Windows PC
Information on PC will remain as isfrom here If you are going to sell, give me or someone else will use the equipment Formatting is recommended. If you keep it with you, you can save it and it will remain as a backup of your information.
You can sign in with the new password created on the Mac and then complete the initial macOS configuration.. The transferred information will already be placed in Finder folders, you can take a look at them to see that everything is in place.
This is information transferred from Windows to macOS
Now that you’ve moved away from Windows, native macOS apps will be your main sources of information. Email, Outlook Mail and Windows Mail settings are now mail app. Your contacts in Outlook, the Contacts folder, or Contacts in Windows 10 go to: Contacts app. All Calendar and Outlook appointments go to: calendar app. Outlook tasks are moved to: Reminders app (only available starting with macOS Ventura or later).
root folder Documents, Images, Videos, Desktop, etc. where it is hosted, They will be like in Finder in a new root folder where you’ll find files from photos to documents. If you must use the native Photos app on macOS, it’s a matter of opening the app and manually exporting your images or letting the app do automatic searches.

Safari on macOS Ventura
Language, localization, and custom desktop display settings, on the other hand, have been moved to macOS Settings or System Preferences. If you have macOS Ventura or later, you’ll notice that information from past connected Wi-Fi networks will also be automatically available. Bookmarks and homepages from other browsers on Windows will be moved to Safari. All music, podcasts, audiobooks, movies, TV series, and TV shows will be hosted in the macOS Music, Podcasts, Books, and TV apps.
The transfer did not take place, what can I do?
Note that both computers need to be updated to the latest versions of their operating systems. Check that the antivirus, firewall or VPN on both computers does not interfere with the procedure. Finally, Check for internal disk problems using the Windows Check utility as follows.
- Search for the Run app in the Windows search bar
- Type cmd (command prompt) and confirm the selection of the application
- writer chkdsk and confirm with the Enter key
- If there are internal problems, you should write chkdsk driver: /(Windows boot disk letter) and confirm with Enter
- Then confirm with the Y key and then restart the Windows PC.
- Repeat the process until there are no more problems with disk drive
In case the transfer cannot be completed, you will need to manually back up the most important files or those you want to transfer to macOS via an external drive.
If you have any questions about the process, we leave you the official Apple support guide with video. Will you miss Windows in the future? Don’t worry, we teach you how to install Windows 11 on Mac.
you can follow iPadize yourself on Facebook, WhatsApp, Twitter (X) or check our Telegram channel to stay updated on the latest technology news.
This article recommends: objective and independent products and services that may be of interest to readers. iPadizate receives a commission when the user makes a purchase through certain links in this news. Join the iPadizate deals channel to find out about the best before anyone else.
Source: i Padizate

